STYLEHAIRFOODCREATEBEAUTYFITNESSVIDEOSFAMILY

Sunday, March 18

Weekend Wrap-Up

13 comments:
This Week: The biggest event this week was officially moving the last few little tidbits (art, plants, doormats, etc) out of our old house in preparation for the new owners to move on in. It was a big step and very thrilling to be done done!! Although I have to admit I felt a little nostalgic as we walked through the rooms where Ellie had taken her first steps or where martin and I had played board games all night long. It will always be our first house, and where I won't miss it, I was a lucky girl to have such a nice fun place to live in as a blushing bride and than as a first time mom.
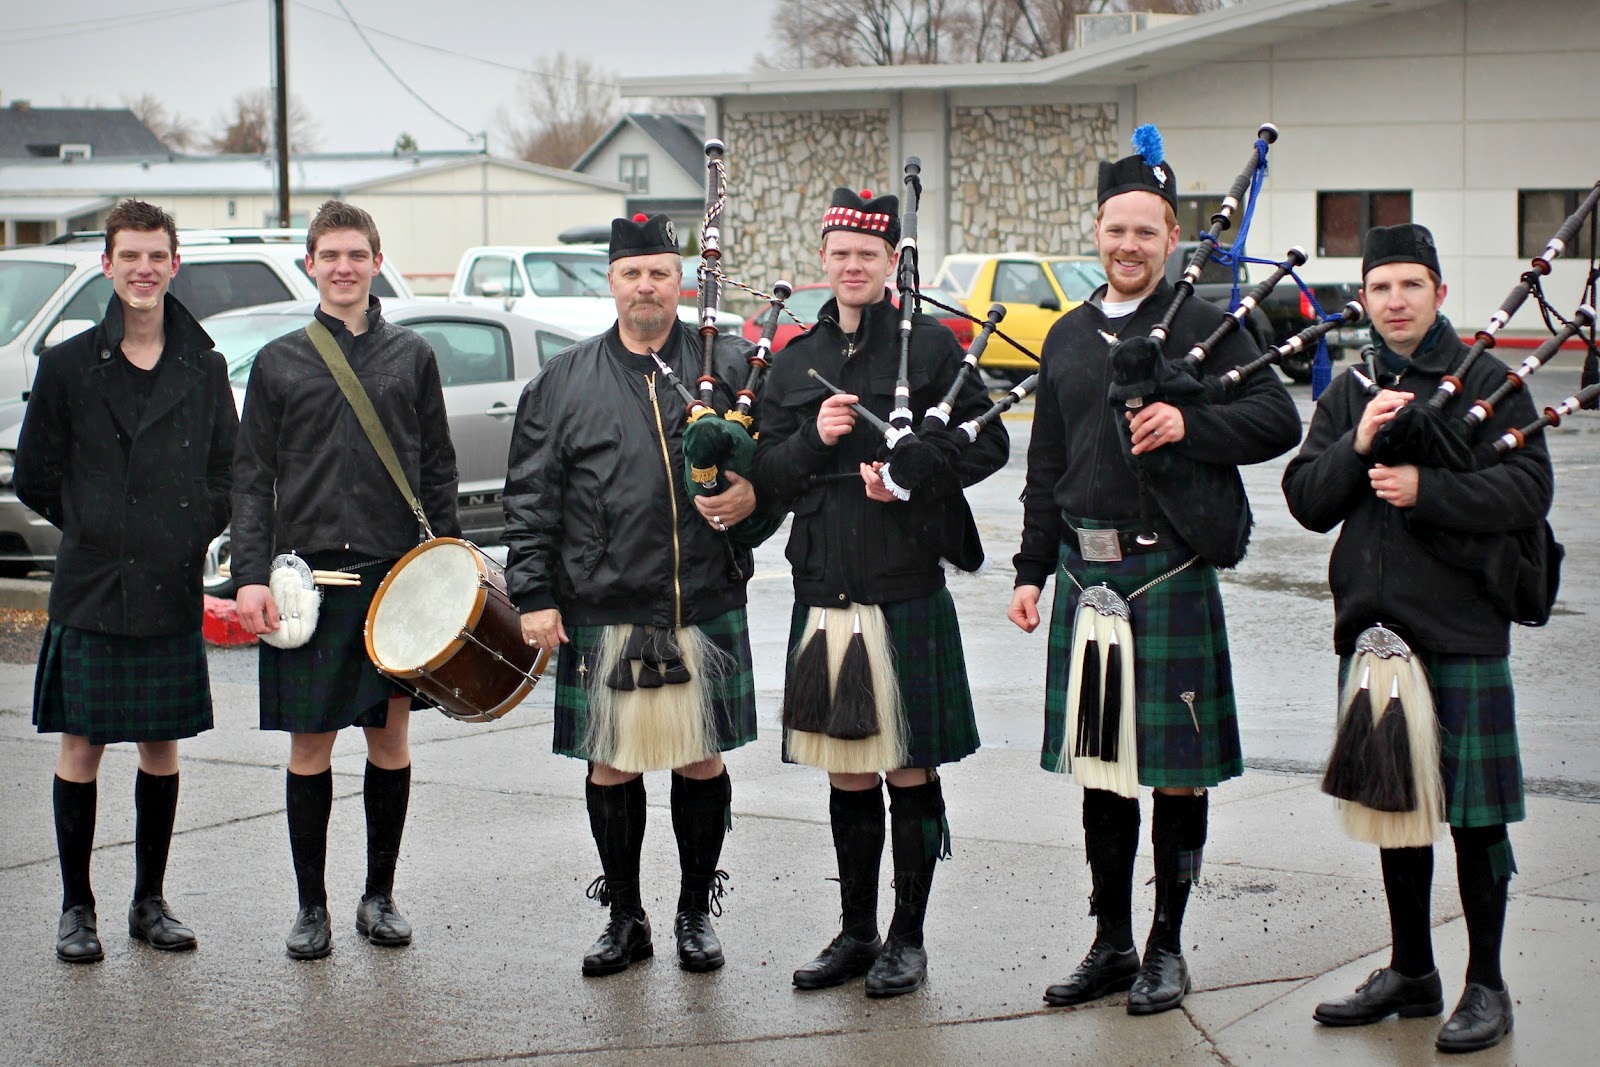
Sorry, moving on! :) Also this last week we had our first meals in the back yard this year! Also our second, and our third. So excited spring is here! I made lots and LOTS of plans for the blog, took a billion pictures, had some fun visits with friends, we made homemade ice-cream for the first time (!), cranked out a few more quilts, spent some fun time with my parents, and watched Martin and his new bagpipe band play in the St. Patrick's Day Parade, (The band's only been together for a little over a month!) so proud of them all!


Weekly Snapshots:
Weeks Favorite: Matching babies reading US weekly:)
Next Week: The biggest event is of course Ellie-Bean turning 2 years old on Tuesday!!! So be prepared for a mushy post about how much we love her:) Also we've made plans to go on a little 'Vaca' to the mountains again, if we can get our taxes done in time:} Which will be a fun time to be isolated and work on a lot of sewing projects! I have such big plans for this blog. Life is just oh so good right now!!


Most popular post of the week: My Maiden Braids Hair Tutorial:)

A Few Facts: 
  • One of my eyes is dark brown, and the other light brown.
  • I have 13 siblings
  • Our house was built in 1907!
  • I've had Regina Spektors 'Samson' stuck in my head for days
Hope you have a fun week ahead!
xo, Emily

Friday, March 16

Friday Finds #12

10 comments:
I really look forward to friday find posts, because I'm so inspired and influenced by so many things lately! Just the right color combination, the right pattern, that special facial expression or outfit. You know, those pictures you see and your mind just says YES! Something about that pictures makes you want to go out and make, creat, or just be. Anyways, here's my list of some of those inspirational items I found this week.
This week I found...

...this beautiful picture of currant berries with a robins egg blue backdrop. My absolute FAVORITE color combo right now. I'm kind of obsessing over it actually.
love red+robin's egg combo! 

...this collection of seashells that sure make me miss the ocean being half an hour from my house:(
beauty of colors in nature 

...this unique pair of street slingbacks from none other than Christian Louboutin. Aren't they just really unique and different, but in a totally wearable way? 
 

...this set of rainbow pyrex bbowls
colored pyrex 

...this tasty looking apricot tart recipe from the canelle et vanille food blog. Man photos like this just make me so inspired to just go in my kitchen and cook!
. 

...this new aspect of yoga that I've never even heard of; Hanging/Ariel Yoga!! How cool is this? haha Not a possibility while i'm pregnant unfortunately, but maybe I'll have to search this out once I pop huh? :)
Hanging Yoga! 

...this set of false eyelashes with Bows in the corners! From none other than Modcloth, and aren't they cute as a button? Wouldn't you know they're out of stock:(
 
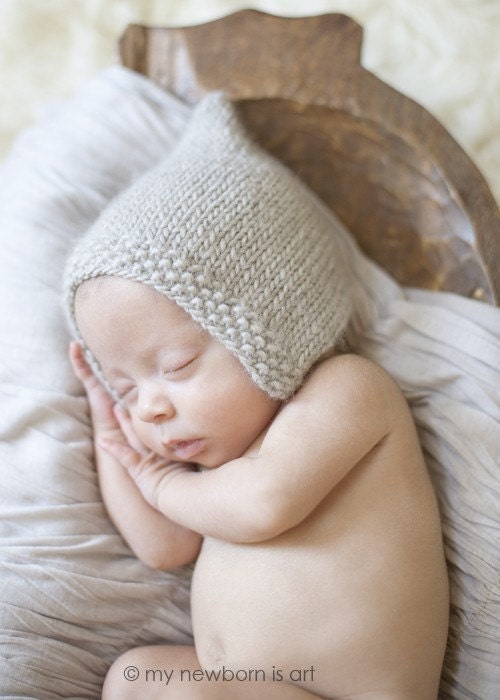
...this newborn pixie cap from Etsy. Simply adorable isn't it?!? Of course its sold:( But I'm going to try and do this in crochet...
Newborn Pixie Cap 

...this scrumptious recipe for lime grilled kabobs. Mmm! my mouth is actually watering right now...
Key West Grilled Chicken (lime, soy sauce, garlic & honey). 

I hope you've found an item or two that leave you feeling inspired in one way or another. Be sure and check out my other Friday Finds posts for more inspiring collections!

xo, Emmy

Thursday, March 15

My Arch Nemesis

6 comments:
Hello everyone! I decided that I'd like to share something about myself today, so to start off I'm just going to say that if I die an untimely unnatural death, it will have something to do with a body of water.
Recently I started thinking about all the times I've seen my life flash before my eyes, and I was actually a little shocked as I started naming them off, and realized that all the near death or physically traumatic experiences I've had in just my twenty something years that have had to do with water.
I've never actually sat and thought about all the times before, but I'd like to take a second now to name a few of these experiences, just so you can see what I'm talking about:
  1. The earliest experience I remember is when I was three, passing out for some reason when I got in the water at a public pool and ending up in the hospital.
  2. When I was about 9, getting my hair caught on handles at the bottom of a pool used for scuba diver training, and ripping out a large chunk of my hair to free myself.
  3. Telling a friend around age ten that I was scared of water as we floated in her pool, only to have her hold my head under to 'help me cure my fear'.
  4. The time I went to a water park with a friend and lost my vision for two hours for some reason after going in swimming.
  5. Getting my foot caught in some roots at the bottom of a lake, in the mountains, at night.
  6. How about the time I got caught in the current and washed down river to the edge of a waterfall only to have my ankle and leg caught in some rocks, than to be suspended at the edge of said waterfall (pillar falls) UPSIDE-DOWN for several minutes with the water rushing over my face.
  7. That moment on my honeymoon on Maui when I saw the shore (and my husband) getting farther and farther away as I swam with all my might to get back, only  to get pulled under again and again.
  8. And there was that time of course getting pulled under and slammed into the sand over and over by waves on the northshore of Oahu. Feeling my body get ripped and tossed around like a ragdoll, knowing that there's not a single thing I can do about it. (We won't go into how the ocean tried to swallow up my bikini top.)
These are mostly off the top of my head. I could go on and on recalling that time with the water-slide or that huge snapping turtle, that day with the tippy canoe, or the leaches episode. The funny thing is that even after all these really bad experiences, I'm still not really afraid of water! I love water and just about all water activities! I'm a little cautious yes, but I don't seem to ever learn I suppose, and I just keep going back for more and more. More tubing, kayaking, swimming, and boating, and yes even more wave jumping on north shore someday perhaps.
Glutton for punishment? I think yes:)

What's something you''re afraid of or have had bad luck with in the past?

Have a lovely lovely day everyone! haha
xo, Emily

Wednesday, March 14

Hair Tutorial // Maiden Braids Updo

32 comments:
Every single time I wear this hairstyle out people compliment it and/or ask how I did it, and lately I've had a few people request a tutorial on the process, so here it is! 

 This hairstyle is super fast and easy (maybe you're noticing a reoccurring theme with all these 'fast and easy' tutorials I have on this blog eh?:)) and its especially nice on an off hair day to have something that I can just whip up and it looks like I've spent a lot of time! I like that I can also wear this with a dress and heels, or with a t-shirt and jeans. People will compliment you every time!

Supplies Used:
  • Volumizing Hairspray
  • Basic Braiding Knowledge:)
  • Hairbrush
  • Bobby Pins
Tip: I certainly recommend doing this in front of a mirror, and checking the back every once in a while to make sure you have a smooth bump goin' on.
 
Step 1: Unless your hair is already full of product you may want to add a bit of texture. I like to use a dry shampoo or just spray a bit of hairspray here and there, lifting as you go, lightly coating areas of your hair. This will not only help with the teasing in step two but will give your hair more fulness and body. 

 Step 2: Devide your hair into two sections (top and bottom), and back comb a little (gently) underneath the top half. Spray with a little hairspray, and smooth over the top with a comb. This will help give you more lift from the front.
Step 3: Devide your hair in half once again, this time from side to side (like your doing milkmaid braids), being sure to separate the hair at the nap of your neck to avoid a severe part. Severe parts are not our friends ladies! They make your hair look thin:) Begin braiding.
 Step 4: Next you'll want to remember to stop braiding about 4-5 inches down and tug the hair out of the braid a bit (we don't want flat head after all our bodifying:)). I usually do this by just put my fingers to my scalp in a pointing upward position, and than move my wrist upward without moving my fingers so that my hand is now pointed in a downward position. Make sense? This tends to lift the hair a bit without frizzing up my smooth do:)
Step 5: Next criss-cross your braids behind your head, and pull the first braid up and over your ears to the crown of your head. Secure your braid firmly by placing your bobby-pins in towards your scalp in a downward position. This will mean you only need 4-6 pins per braid! When you bring your second braid up to pin, simply tuck the ends of each braid underneath the other and secure with a couple pins.
  Step 6: Once you've got your braids both secured well, you may wish to 'fluff' up your volume again using your fingertips or whatever. Gravity is not our friend, and will constantly work against those of us who want big hair:) Spritz on another little coating of hairspray, and that's all there is to it!! 
Now that you're all done you'll want to take a hand mirror or use a two-way mirror to check the back of your lovely new do! If you find your hair to be a little frizzy or unkempt (ahem), use a comb to fine-tune the back. 
Be sure and ask if you have any questions about this hairstyle or requests for future hair tutorials. Also let me know if you decide to give this a try! 


Have a wonderful Wednesday!
Xo, Emmy

Tuesday, March 13

Em's Key Lime Cake

13 comments:
I'm so excited about this recipe today, because not only is it incredibly easy and delicious, but its also very fun and festive for St. Patty's Day coming up this weekend!
My favorite dessert combination is citrus and sweet, so I set out to make an easy tangy citrus cake with a sweet cream cheese icing, and I did just that!(If I do say so myself:)) The cake is so moist and fluffy, and the tang from the limes mixed with the sweet rich icing is the perfect combination. Martin decided the name by proclaiming that it tasted just like key lime pie only in fluffy cake form:)
So here is the recipe , and the method, I hope you give it a try and let me know what you think!
Em's Key Lime Cake 
Ingredients:
For Cakes:
  • 1 box Lemon Cake Mix
  • Generous 1/2 cup fresh Lime Juice (around 4 limes)
  • 2 tablespoons Lime Powder 
  • 1/2 cup Milk
  • 1/3 cup Olive Oil
  • 4 medium Eggs
  • 1/4 cup water
  • Green food coloring (optional:))
for Icing:
  • 1 8-ounce package cream cheese
  • 1 pound powdered sugar
  • 1 stick butter (softened, but not melted)
  • 1/4 teaspoon salt
  • 2 teaspoons vanilla extract
For Garnishes: I shaved off a little of the bottom cake round to crumble on top (only a tiny bit!), and than added a few layered lime slices to the center as you can see:)
Method:
For Cakes:

Step 1: Preheat your oven according to your cake mix directions (I used 2 9" rounds, so 350 degrees).

Step 2: In a medium sized bowl mix together the cake mix (dry ingredients bag only), the lime juice (hold back a few lime slices for your garnish!), lime powder (if using), milk, olive oil, eggs, and water for 2-3 minutes at medium speed. Go ahead and add your coloring if you want now, just add it a drop at a time, cuz this stuff is potent! haha
Step 3: Give your starving child a drizzly spoon to taste the batter, and don't forget your camera! Go ahead and try to lick off one of the mixers without getting green it on your own nose in the process, because it didn't work for me.
Step 4: Divide the batter equally among your two (or however many you choose) greased cake pans, and place them side by side in the oven for the lowest allotted time on your box (mine was 25 mins.). Once your timer has gone off the first time you know to keep watching and checking to make sure they're cooked perfectly. Once our toothpick inserted in the center comes out clean you know your cakes are done.

For Your Icing:
Step 5: While your cakes are snug in the oven, mix together all your icing ingredients and blend throughly until smooth creamy. Give it a taste here and there to make sure its delicious enough, or if you need to add a little more of this or that:)

Step 6: Once cooled, remove your cake rounds by turning them upside down against your palm or a plate, and gently tapping the base of the pan (They should just plop right out). Lay your first round on the platter you're using and begin icing! Once you've covered the top of the round, carfully place your second round and proceed to use the remainder of your icing to cover the entire confection in white deliciousness.
Step 7: Cut up immediatly and distribute out to your starving family members and guests, or place the cake in the refrigerator until its time to serve, to help keep the icing firm.

And there you have it!! Doesn't it look tasty?? If you decide to give it a try this weekend, or whenever I'd love to hear  how it turns out for you!
Have a lovely lovely day!
Xo, Emily


Monday, March 12

What I wore // denim and ruffles

19 comments:
head to toe:
ruffled buttondown - motherhood 
knit sweater- ae 
jewelry - target
jeans - ross
handbag - downeast
leopard highheels - dollhouse


Hope you had a good start to your week everyone!
Xo, Emmy

Sunday, March 11

Vintage Toy Cravings

8 comments:
Ever since I can remember I've had a soft spot for vintage and vintage style toys, and it seems our girly's are no different! Nana Meyers bought Ellie a few wooded puzzles and things for Christmas last year, and both of the girls can spend hours playing with (or in Sophie's case 'biting') them. 
We have a growing collection, but I'm always on the lookout for more to add to it. So you can imagin my excitment at discovering so many lovely vintage toy shops on Etsy! Here are a few of my favorites items from a little shop called Oopsie Daisies:
1.'Little People' House 2.Fisher Price Telephone 3.Sewing Machine 4.Hickory Dickory Clock
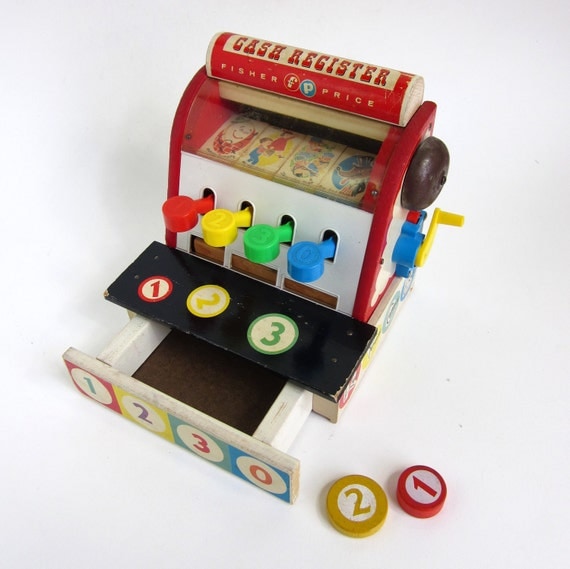
My favorite though has got to be this cash register:
Fisher Price Cash Register 60s / Great Condition
(chick image for source)
What fun things are you contimplating adding to your house this week?

Have a fantastically relaxing day!
Xo, Emily

Saturday, March 10

Weekend Wrap-Up #1

4 comments:
Hello lovelies!! I don't know if you noticed that there was no bits and pieces last week, or a this moment the last two weeks, but I'm here to tell you know that I'm molding both those weekend feature posts into one, and calling it weekend wrap-up! That way I can have more days free to present you with more lovely posts! I'm looking forward to sharing fun things we did or tried, maybe some goals for the coming days, and all the while sharing fun miscellaneous pictures from the weeks adventures!!

This Week: It started out with lots of housework and good chores crossed off the list, a few fun errands (new baby stuff!), our first walk of the season (and second, and third.hehe), I crossed off a lot of personal goals, Martin officially started a new novel! I had a fun visit with my ladies at the quilters guild (and am looking forward to a swap we're doing), lots of fun treats and late mornings, and today is a play day! 

Weekly Snapshots:

Weeks Favorite:
Next Week: Really looking forward to a lot of photoshoots, car trips, house progress, quilting, and a lot of snuggly movie nights. Be on the lookout ofr some really fun tutorials and recipes as well!


Most popular post of the week: My hanger makeover tutorial of course!

A Few Facts: 
  • I'm a 'Whovien' (Doctor Who fan).
  • I ate four small watermelon last week by myself.
  • I can clog.
  • I love to vacuum. It really relaxes me.
  • Martin is awesome at the bagpipes:)
Hope you have a cozy weekend all!
xo, Emily