


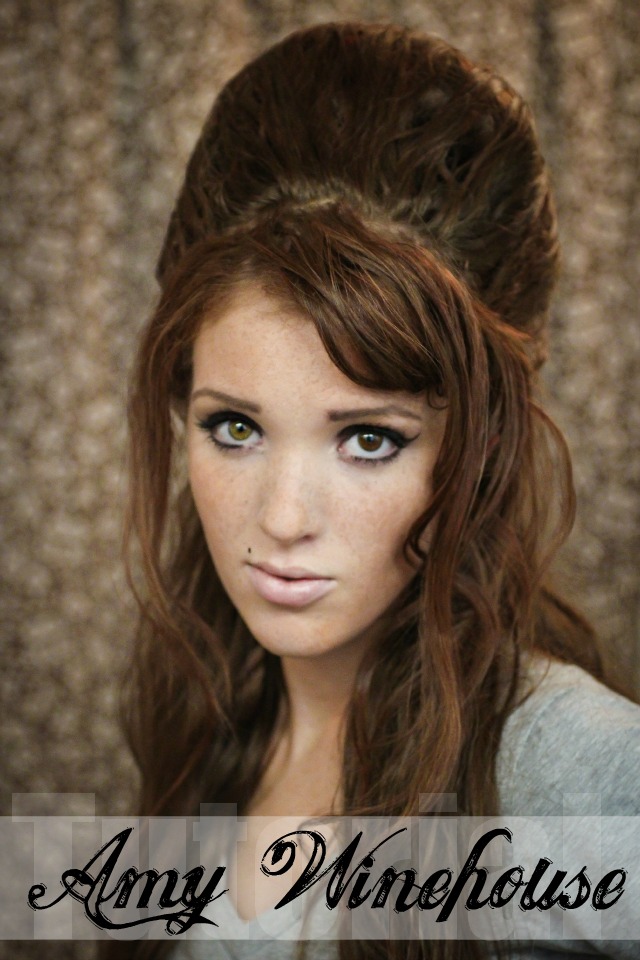
Hey guys! Whoa, Halloween is getting so close! This is such a fun post today, because its the first post in response to the Halloween hair tutorial requests! A whole lot of you asked for a 60s Beehive step-by-step, and a few asked for the Amy Winehouse 'thang', so I'm actually going to combine both those styles for you today!
 Every time I've seen beehive tutorial videos done they always use backcombing to get the volume, and it makes me cringe to watch them ripping and tearing at the hair like that! I use essentially the same method for obtaining the signature Amy 'do' and the classic and tidy 60's Beehive, and today I'm going to share that cleaver method to help you achieve the huge bouffant using absolutely NO BACKCOMBING at all! Is that cool or what?!
 Lets begin with the Amy Winehouse!:
Supplies Used:
- strong hold hairspray
- brush or comb
- bath loofah
- hair-tie or clip
- bobby pins
- curling iron (optional)
Method:
Step #1: Begin with 'old hair'. You're gonna need all the grip you can get, so I started with three day old hair that had product from previous stylings. You're going to apply yet another coating of hairspray all over and throughout your hair, continually pulling hair up and letting go as you spray so your hair won't get stiff!
 Step #2: Separate a bangs section from your hair and pin on your for-head. Next put your thumbs to your temples and then scoop the top section of your hair, meeting your thumbs together in back, and pull that hair up and forward and pin in on top.
 Step #3: This is the fun part! take your loofah and plop it right on the crown of your head! Proceed to pin all the way around, right through the loofah and onto your scalp, securing in place. (I used about a dozen).
 Step #4: Release the bun on top of your head and separate into a top section and two side sections. Starting with the top, pull upwards and spray heavily with hairspray. Give a second or two to dry, then wrap up and over the loofah, securing to your scalp with as bobby pins.
 Step #5: When starting on a side section hold out straight from the head and shellack with hairspray rubbing your hand over the front in one direction, to smooth over and create a 'sheet' or hair. This step will ensure that your loofah never shows throughout the hair!
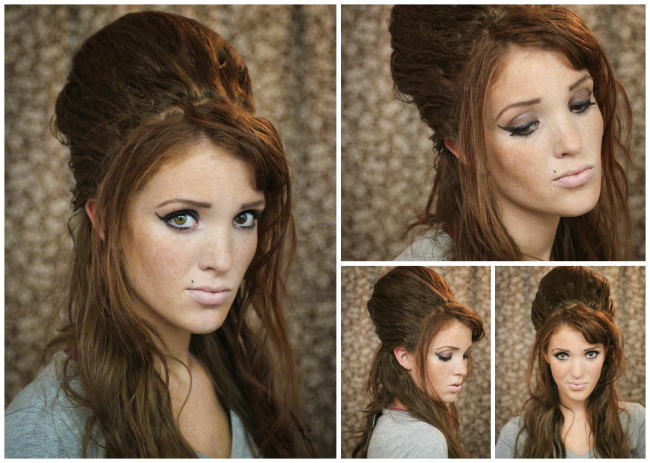
 Step #6: Repeat step 5 on the other side, and pin securely (with the other two sides) at the back of your head. Curl your bangs a bit if you wish, and fluff up the hair you've left out a bit more with hairspray. Don't forget to add your beauty mark, and you're all done!!

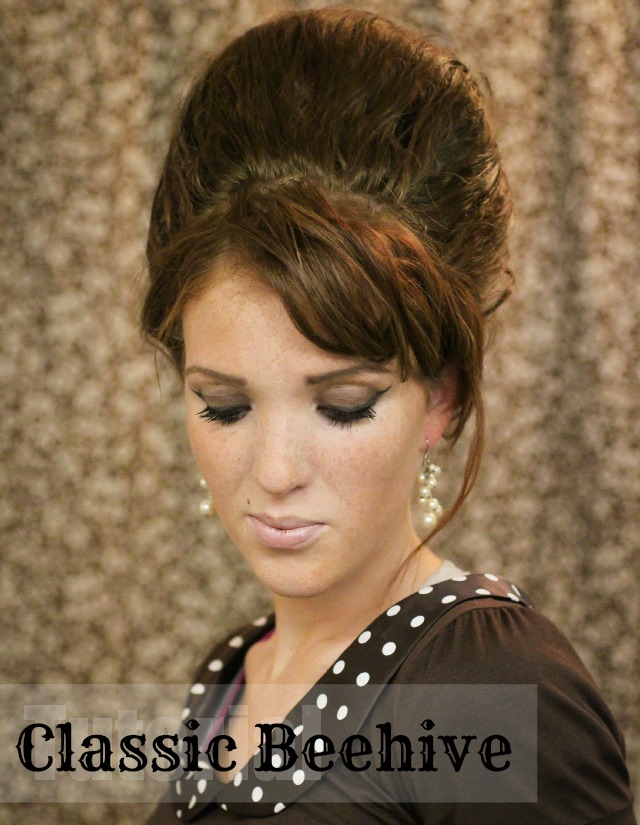 Tip 1: When beginning the classic beehive you'll want to keep things a bit more smoother on top with a comb as you go along.
 Tip 2: Repeat steps 1-6, but remember to keep combing the top through, to maintain that smooth and classic 60s look.
 Tip 3: Once the steps are completed, brush through the hair you've left out of the beehive, and twist it into a tight spiral. Start rolling it around three fingers from the ends to the roots, and pin the 'cinnamon roll' at the base of the beehive. and Voila!!
I hope this has been a help to you ladies that were wondering, and I'd love to see how your styles turn out!
Thanks for reading lovelies, and have a terrific weekend!
xo, Emily
P.S. if you're going for Bride of Frankenstein, crimp your hair with a tight waver before doing steps 1-6. When pulling up and around the loofah, do not leave any hair out for bangs or to be long on your shoulders, but rather bring all hair back and away from your face. This would also work great for Marge Simpson:)
Supplies Used:
- strong hold hairspray
- brush or comb
- bath loofah
- hair-tie or clip
- bobby pins
- curling iron (optional)
Method:
Step #1: Begin with 'old hair'. You're gonna need all the grip you can get, so I started with three day old hair that had product from previous stylings. You're going to apply yet another coating of hairspray all over and throughout your hair, continually pulling hair up and letting go as you spray so your hair won't get stiff!
Additional steps (and a few alterations) to achieve the 60's Beehive
I hope this has been a help to you ladies that were wondering, and I'd love to see how your styles turn out!
Thanks for reading lovelies, and have a terrific weekend!
xo, Emily
P.S. if you're going for Bride of Frankenstein, crimp your hair with a tight waver before doing steps 1-6. When pulling up and around the loofah, do not leave any hair out for bangs or to be long on your shoulders, but rather bring all hair back and away from your face. This would also work great for Marge Simpson:)


Nice tutorial, as usual :) The sponge trick is quite effective !
ReplyDeleteI found this cute nails diy yesterday and I think it might be perfect for halloween :)
> http://honestlywtf.com/diy/diy-drippy-nails/
Whooo beehive! Pretty cool.
ReplyDeleteEmily! I love this tutorial!!! Xo
ReplyDeletemegthecoolgirl.blogspot.com
Great tutorial ! I wish I had so much hair as you !
ReplyDeleteXX Luba
Well Living Blog
Michael Kors bag :: GIVEAWAY
http://very-well-living.blogspot.com.es/2012/10/worldwide-giveaway-michael-kors-bag.html
I am loving this tutorial! I also really like your suggestions at the button for halloween hair!
ReplyDeleteCarlee
Almost Endearing
so beautıful
ReplyDeleteOh wow, that is great! Thanks for another awesome tutorial.
ReplyDeleteThis is so awesome! That's a very clever idea to use the loofah! Never would've thought of that! :)
ReplyDeleteGreat idea to use the loofah! You have such pretty hair! Thanks for the easy to follow tutorial!!
ReplyDeleteChristina
www.lipbalmwrangler.com
Love this tutorial! I just wrote about it on my New Year's Eve costume post. I was really pleased with the way my hair turned out and people LOVED the bath pouf when I showed them what was inside.
ReplyDeleteIt's a great tutorial: it's easy and looks great. Most important you don't have to backcombe your hair so it won't be damaged! Instead of the sponge I also use a brown (like my haircolour) hair donut and put some fake hair around it, so it looks natural even if it's not all coverd by my own hair. A smaller one for week days and a big one when I go out...
ReplyDelete