


Good morning! My original title for this tutorial was 'The 'Ten Second Sock Bun', because it literally takes less than a minute to complete! Even for beginners! I changed it however only because there are a few different types of sock buns, and while I prefer this textured style because it is the fastest (in my opinion), I'd like to do tutorials in the future showing the different types and their pros and cons. But for now isn't this one just fun?!

Its called the sock bun because there is literally (I'm feeling very literal today as you can tell:)) a sock inside the bun! This style is both fancy and casual, and is a quick and easy way to spruce up an every-day ponytail. It also works great with any texture of hair, and your hair doesn't need to be very long at all because the sock puffs your bun right up!!
It almost is so easy that I really don't need to break it down, but some people are not only very visual learners, but could do with a bit of explaination as well. 'Sides, being through in my tutorials is kinda the way I roll, so there:)
Supplies used:
- one hair-tie
- one sock (light for blondes, dark for...darks:))
Step 1: Start with your hair out and messy. No need for brushing or whatever if you're going for texture! Dig through your mans socks and find one with a whole or a missing mate so he won't be mad, and chop off the toe:) (The longer the sock, the bigger your bun!) Next start rolling the side over onto itself to make a little sock doughnut. Make sure to not worry about rolling tightly, because you'll get more size if your doughnut is loose!

Step 2: The next thing you'll do is to pull your 'underbrushed' hair back into a high ponytail (or however high you want your bun), put your thumb and forefinger through the whole on your sock doughnut, and grab your ponytail about halfway up. Once you're to this point you'll of course pull your hair through and start wrapping your hair around the sock from the middle to the outside.

Step 3: Once you have the ends of your hair tucked around the doughnut, make sure they're spread around the doughnut enough to start covering up the color a bit, and start rolling! Rollin' rollin' rollin', you're going to want to keep spreading your hair around the sock as you roll the inside to the outside, coaxing the sock closer to your scalp. Once there your hair will keep the sock from going anywhere! No bobby pins required! And you're done!

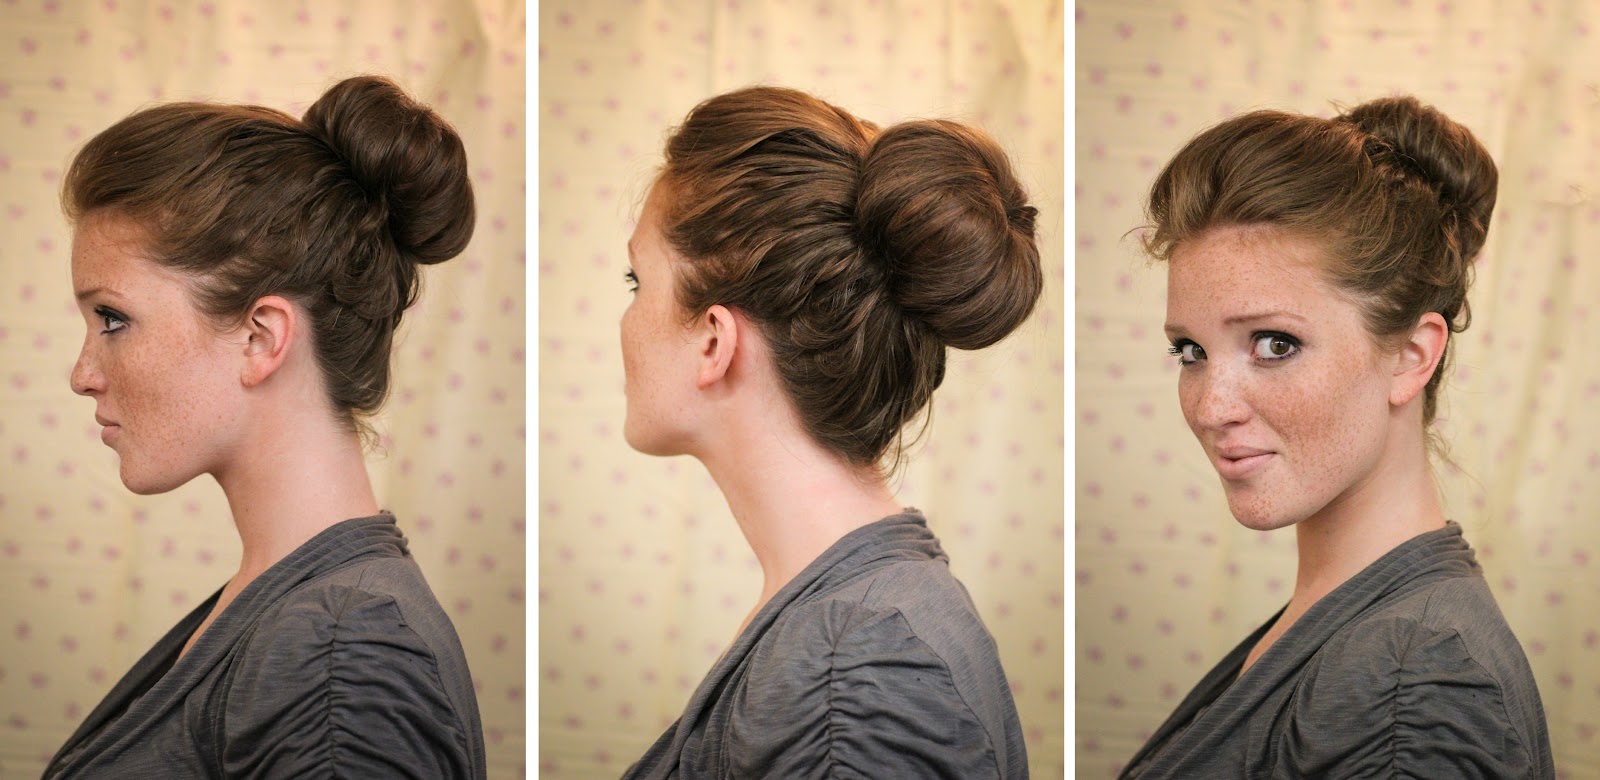
Tease your hair on top a bit for more volume if you like, finger comb those neck flyaway's if their sticking out, give your head a little spritz with hairspray if you need, and you're good to go!! Remember that when you're taking your bun to simply roll it backwards from the outside to the inside and it will come right out as easy as that:)

Also keep in mind that you might want to save your sock in your closet somewhere for extended use. Your man probably won't appreciate his socks disappearing because you love yourself some easy sock bun! haha
Have a lovely day everyone! And as usual, feel free to let me know if you have any questions or decide to use this style anytime because I love to hear feedback!!
xoxo, Emmy
P.S. I've had a few people ask if I'm okay if they pin my tutorials: Of course I am! In fact I'd love for you to!! I only ask that of course you link it back to the blog and credit accordingly. Ta-ta!


I love look of the sock bun, however I have so much hair it doesn't work for me. ;) So I go with the fun bun! xoxo A-
ReplyDeletethis is very cute!! love it!1
ReplyDeletePretty! And easy! I can't wait to get home and try it
ReplyDeleteOk I feel like a real idiot, and can't believe I'm actually going to admit this. I never knew that the sock bun has a literal SOCK in it. It looks great though! Explains why mine never look so full. Thanks for the tips.
ReplyDeleteYou make these all look so easy to do, haha! I wish I had your mad hair skills! x
ReplyDeleteVery classy, and yet it would work really well going casual too. =D
ReplyDeleteThese are awesome, Emily.
how super cool is this!!!
ReplyDeleteomgosh. i really have to try this.
ohh i am going to have to try this
ReplyDeleteso sophisticated - love it :)
ReplyDeleteThanks for the tutorial! I have to say this looks like a great BUN!! Just wanted to let you know if you have a minute stop over at my blog I have something for you! :)
ReplyDeleteI wish my hair were longer so I can do this! It looks adorable on you as always :)
ReplyDeleteandrea brionne @thedailyeverythings.blogspot.com
That is just so beautiful! I really need to grow my hair just a bit longer so I could manage this look.
ReplyDeleteThanks so much for your sweet comment as well. I found your blog the other day through the Dainty Squid and just knew I had to follow:) I'm a work at home mommy too!
xx Marisa
i tried this before, but i think my hair is just a tad too short. also, i love that "textured bun" font - what is that?
ReplyDeleteLooks very cute, I definitely need to try this!
ReplyDeleteummm, okay I just fell in love with your blog! the hair, the food, the fashion, the baby bump!
ReplyDelete<3 it all
love this blog! thanks for following MJ's Product Reviews. I am following you back and will head over to your FB page. Have a great day!
ReplyDeleteOh. my. gosh. Just came across you blog looking for new hair do's for work. Your tutorials are super fabulous! I'm so excited!
ReplyDeleteDo you think this could be used for my little ballerina girl?
ReplyDeleteI love it!! I'm going to try it right now!! :)) thank you so much for the tutorial ♥
ReplyDeletedefinitely trying this! thanks for sharing :D
ReplyDeleteLove this bun as it unique for me, also got trouble in forth steps.. enigmas | Hair salon price list
ReplyDeleteReally beautiful. Do I have to use a big doughnut for a long hair? (my hair is until my waist)
ReplyDelete