


Hello my people! How is your Summer going? Can you believe we have just about a month left before school starts again? I honestly thought we'd be spending much more time on the road than we have, but then I realized that most of our reasons for traveling so much in the past has been to attend get-togethers and events with my family here in Utah, but now we don't have to! It's been pretty surreal to be so close to so many of my siblings and their families, aunts and uncles and cousins, etc, and we've already seen them more in the last few months than the last several years combined at least. The kids especially love having over 20 of their cousins right here around us, and with so many exciting and new things to do as well we are pretty contented staying right here:)
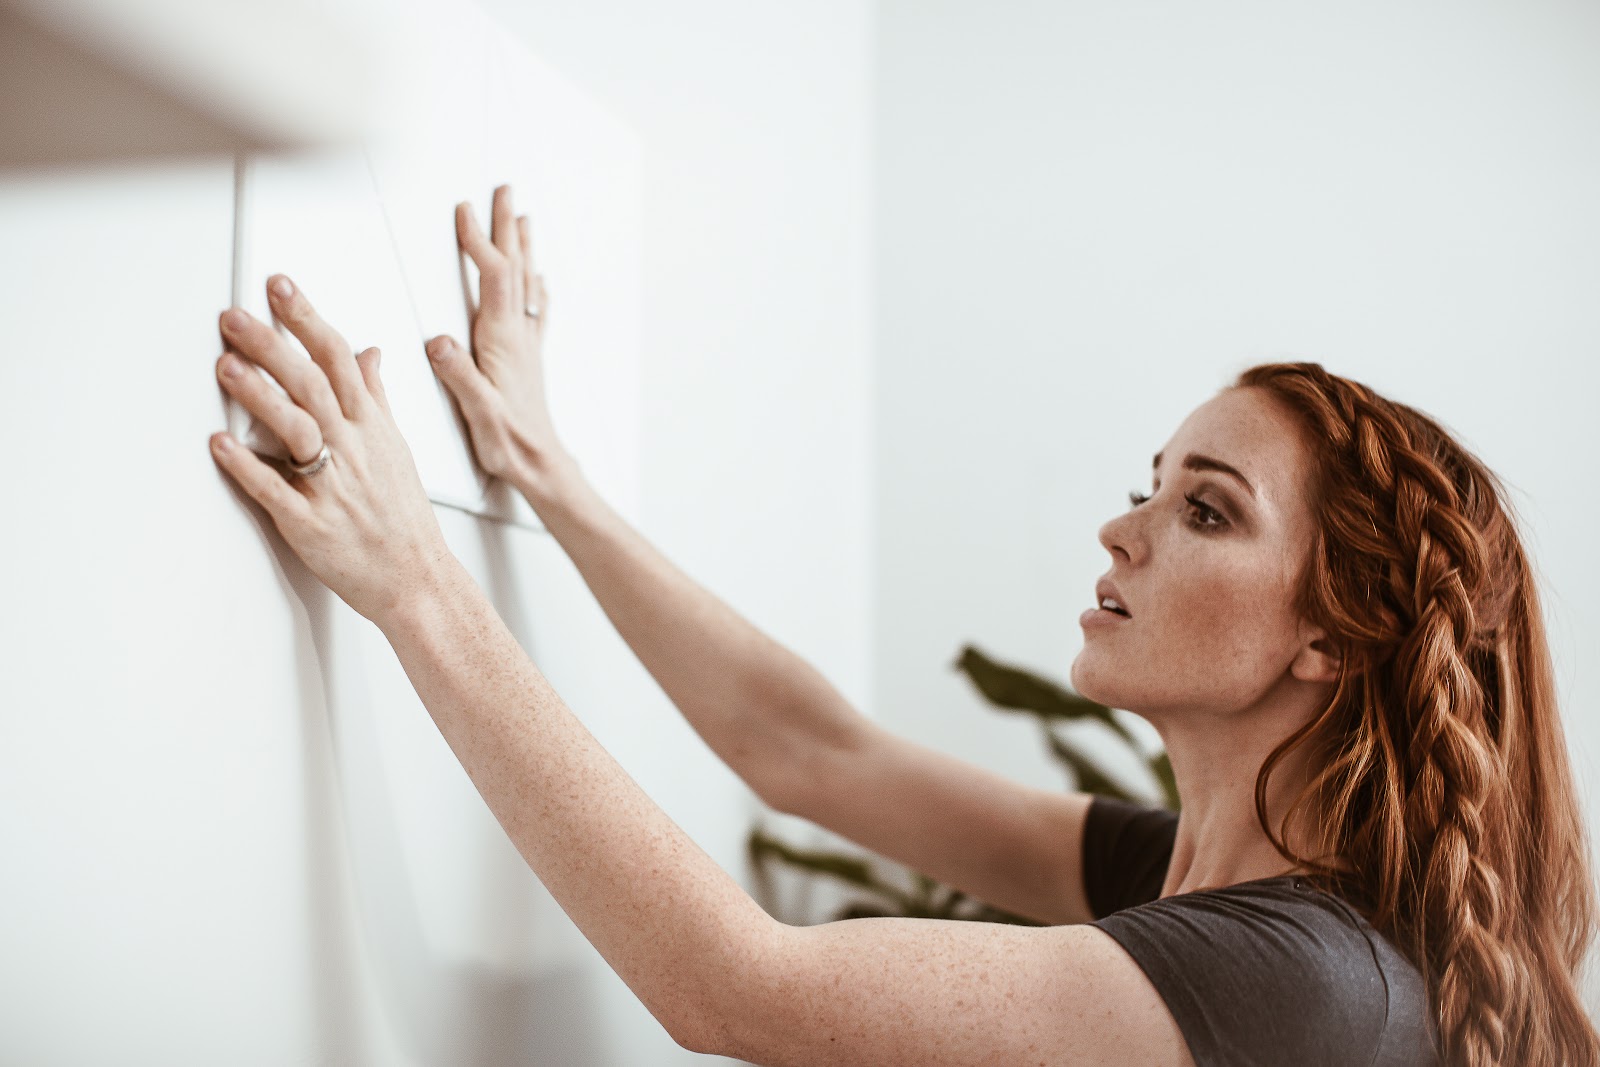
Less time driving has meant extra intentional family time going on hikes, making treats, swimming at the pool, etc. Personally, I've loved the time to catch up on house projects and getting more settled into our place, and today I've partnered with 3Form Home to share 3 simple DIY projects that I did all in under an hour using Sola Felt Tiles!
I was really intrigued when I first heard of Sola Felt Tiles and the endless possible uses, but I knew I was sold when I read that every box of 6 12x12 tiles is made with 50% recycled post-consumed plastic materials, and contains the equivalent of a 24 case of single-use water bottles. How cool is that! We throw away many millions of plastic bottles every day, and I'm so happy to support a company that is turning that waste into something so useful and beautiful.
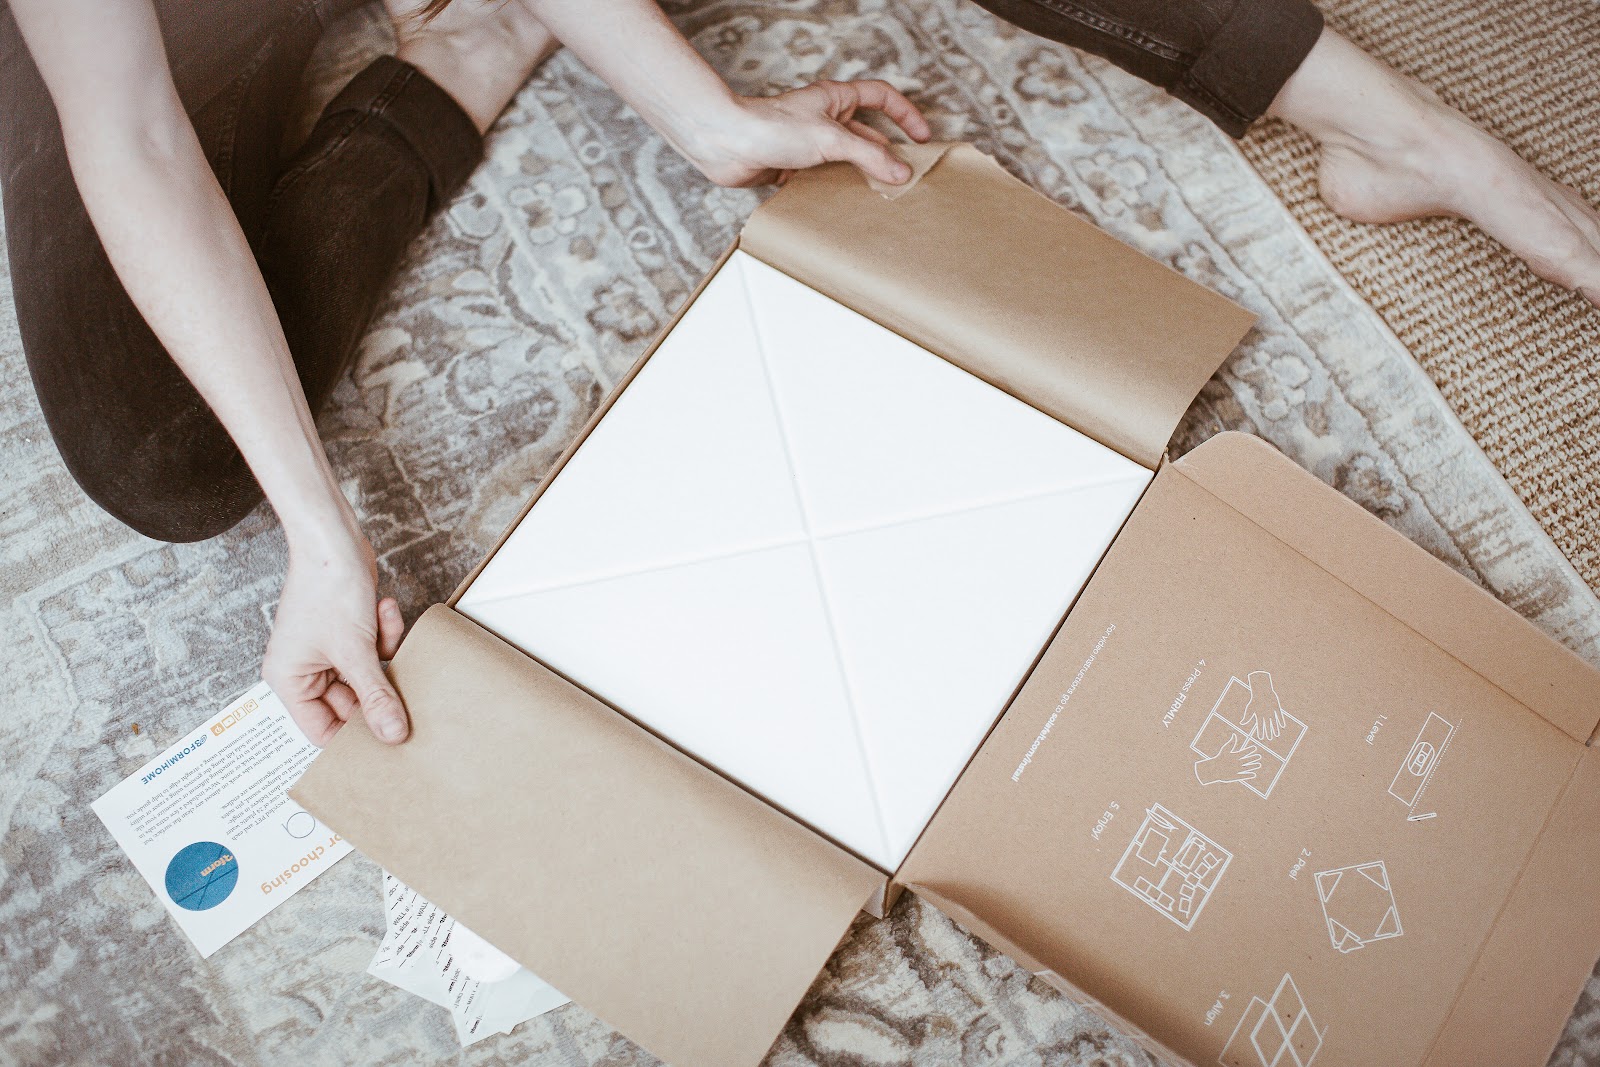
The tiles look soft and feel like wool, they function like a sturdy corkboard, and they attach securely to any clean flat surface with peel and stick adhesive on each corner. The squares are totally configurable with 15 colors to choose from and 6 different shape designs that you can mix and match all you want, or you can purchase one of their cute pre-configured packages.
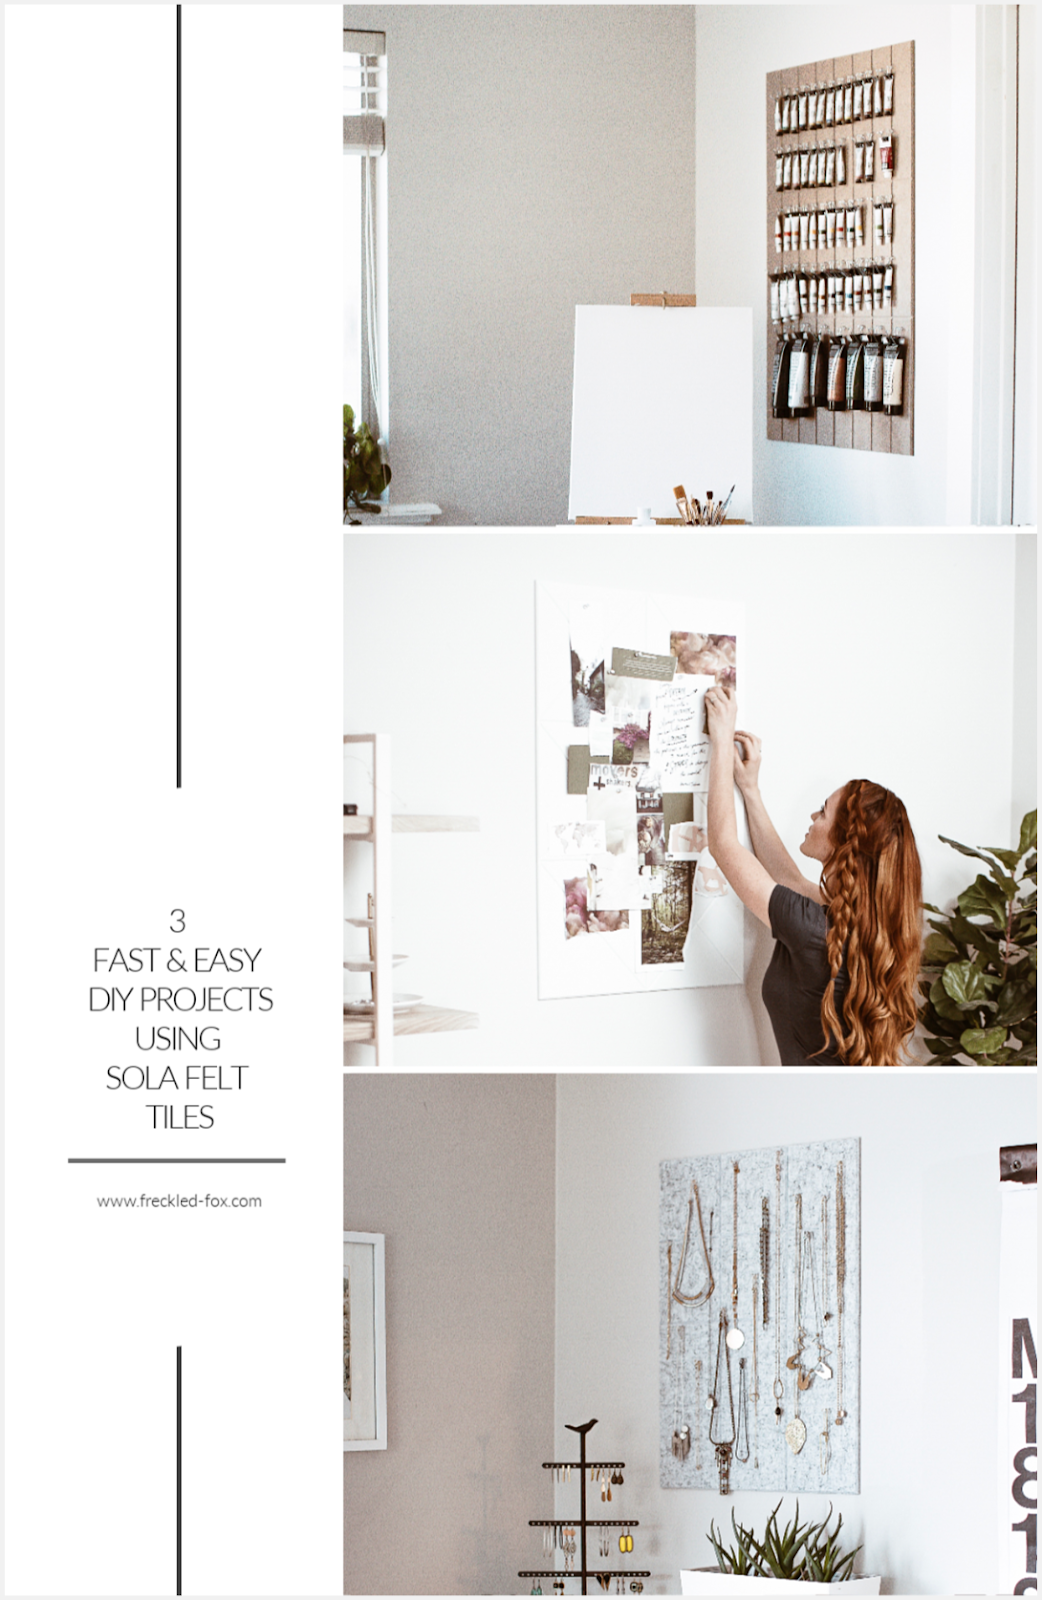
Now I'm going to quickly show you how I created our Paint Tube Organizer, the White Mood Board of my dreams, and a simple and beautiful Necklace Rack.

Side-note: When I first ordered the tiles I was pretty confident that my big tubes wouldn't hold up, but when they arrived I was happily surprised at how dense and strong they actually were and even my big full tubes hold up awesome!

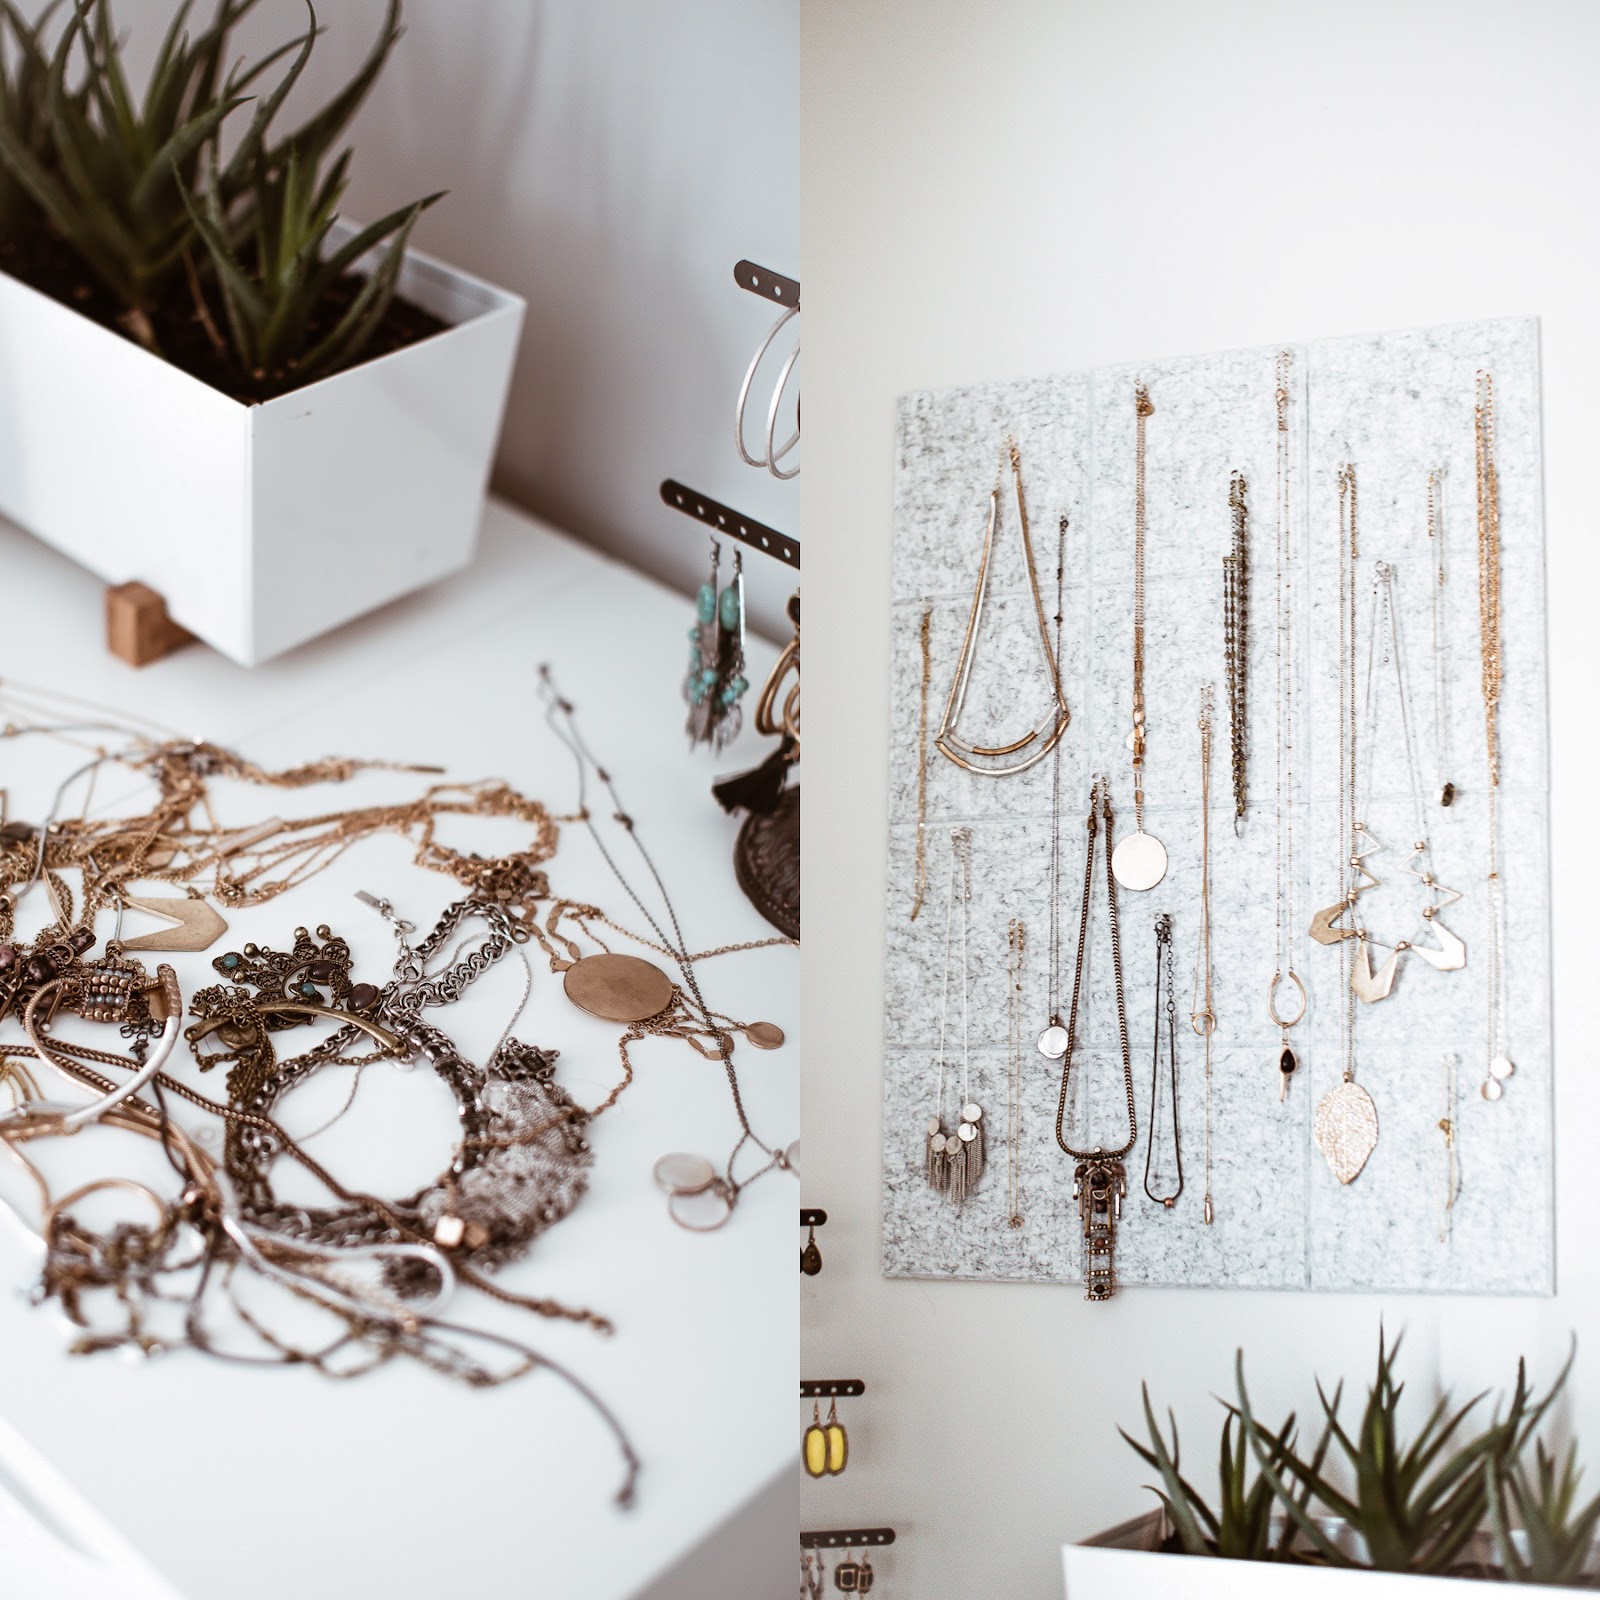
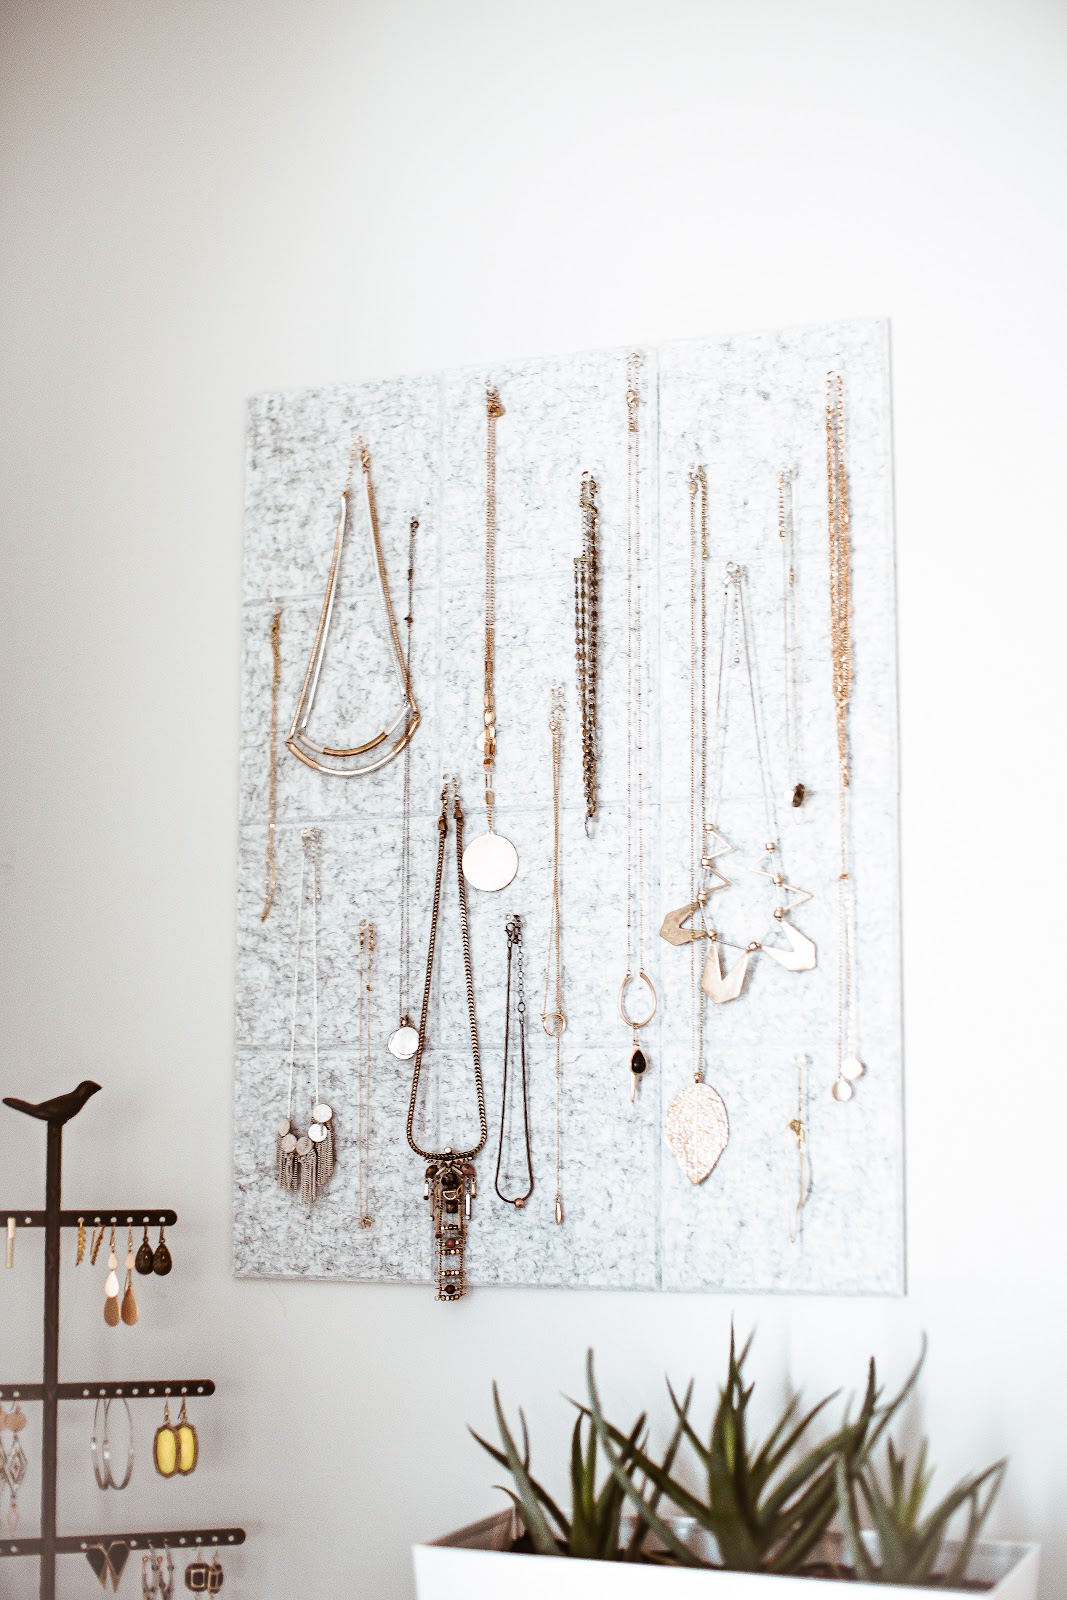
Set-up: Once again you'll repeat the same steps as for unpacking and placing the tiles, except after placing my first two tiles one on top of the other, I cut along the indentation on the third and added one half securely to the right of both the top and the bottom tiles, being careful to put the clean edge on the outside. After that, it's just staggering your push-pins wherever you want and placing your jewelry:)
Less time driving has meant extra intentional family time going on hikes, making treats, swimming at the pool, etc. Personally, I've loved the time to catch up on house projects and getting more settled into our place, and today I've partnered with 3Form Home to share 3 simple DIY projects that I did all in under an hour using Sola Felt Tiles!
I was really intrigued when I first heard of Sola Felt Tiles and the endless possible uses, but I knew I was sold when I read that every box of 6 12x12 tiles is made with 50% recycled post-consumed plastic materials, and contains the equivalent of a 24 case of single-use water bottles. How cool is that! We throw away many millions of plastic bottles every day, and I'm so happy to support a company that is turning that waste into something so useful and beautiful.
The tiles look soft and feel like wool, they function like a sturdy corkboard, and they attach securely to any clean flat surface with peel and stick adhesive on each corner. The squares are totally configurable with 15 colors to choose from and 6 different shape designs that you can mix and match all you want, or you can purchase one of their cute pre-configured packages.
Now I'm going to quickly show you how I created our Paint Tube Organizer, the White Mood Board of my dreams, and a simple and beautiful Necklace Rack.
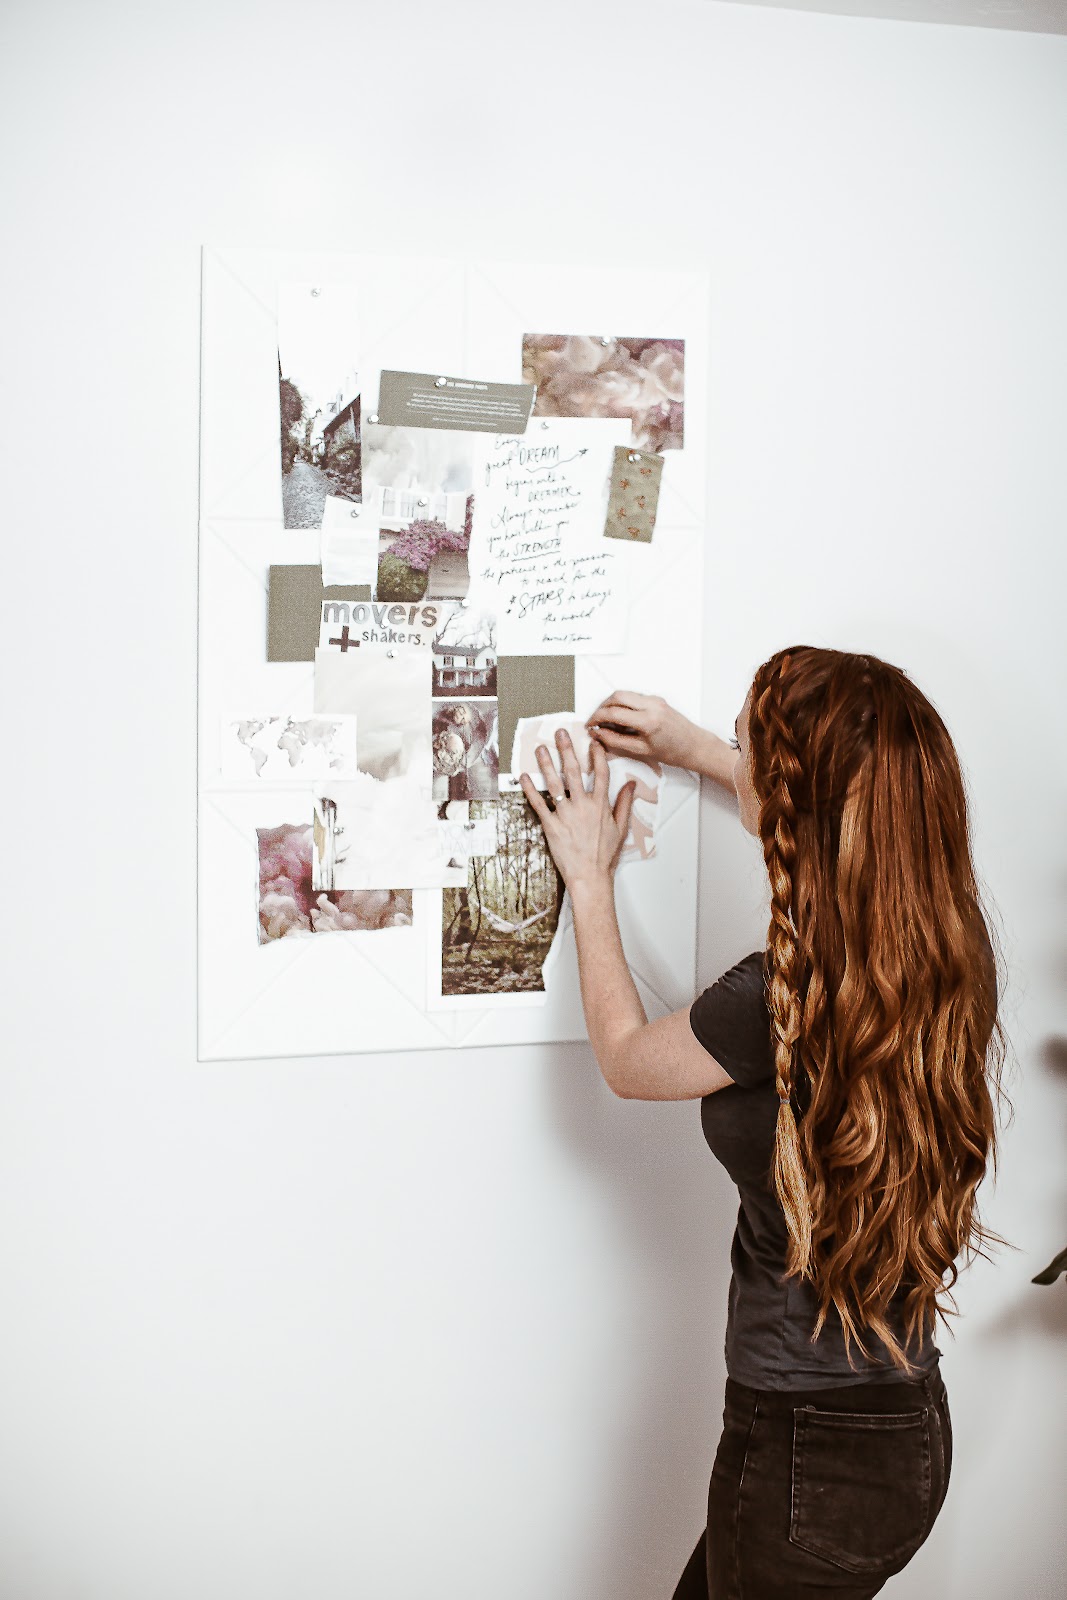
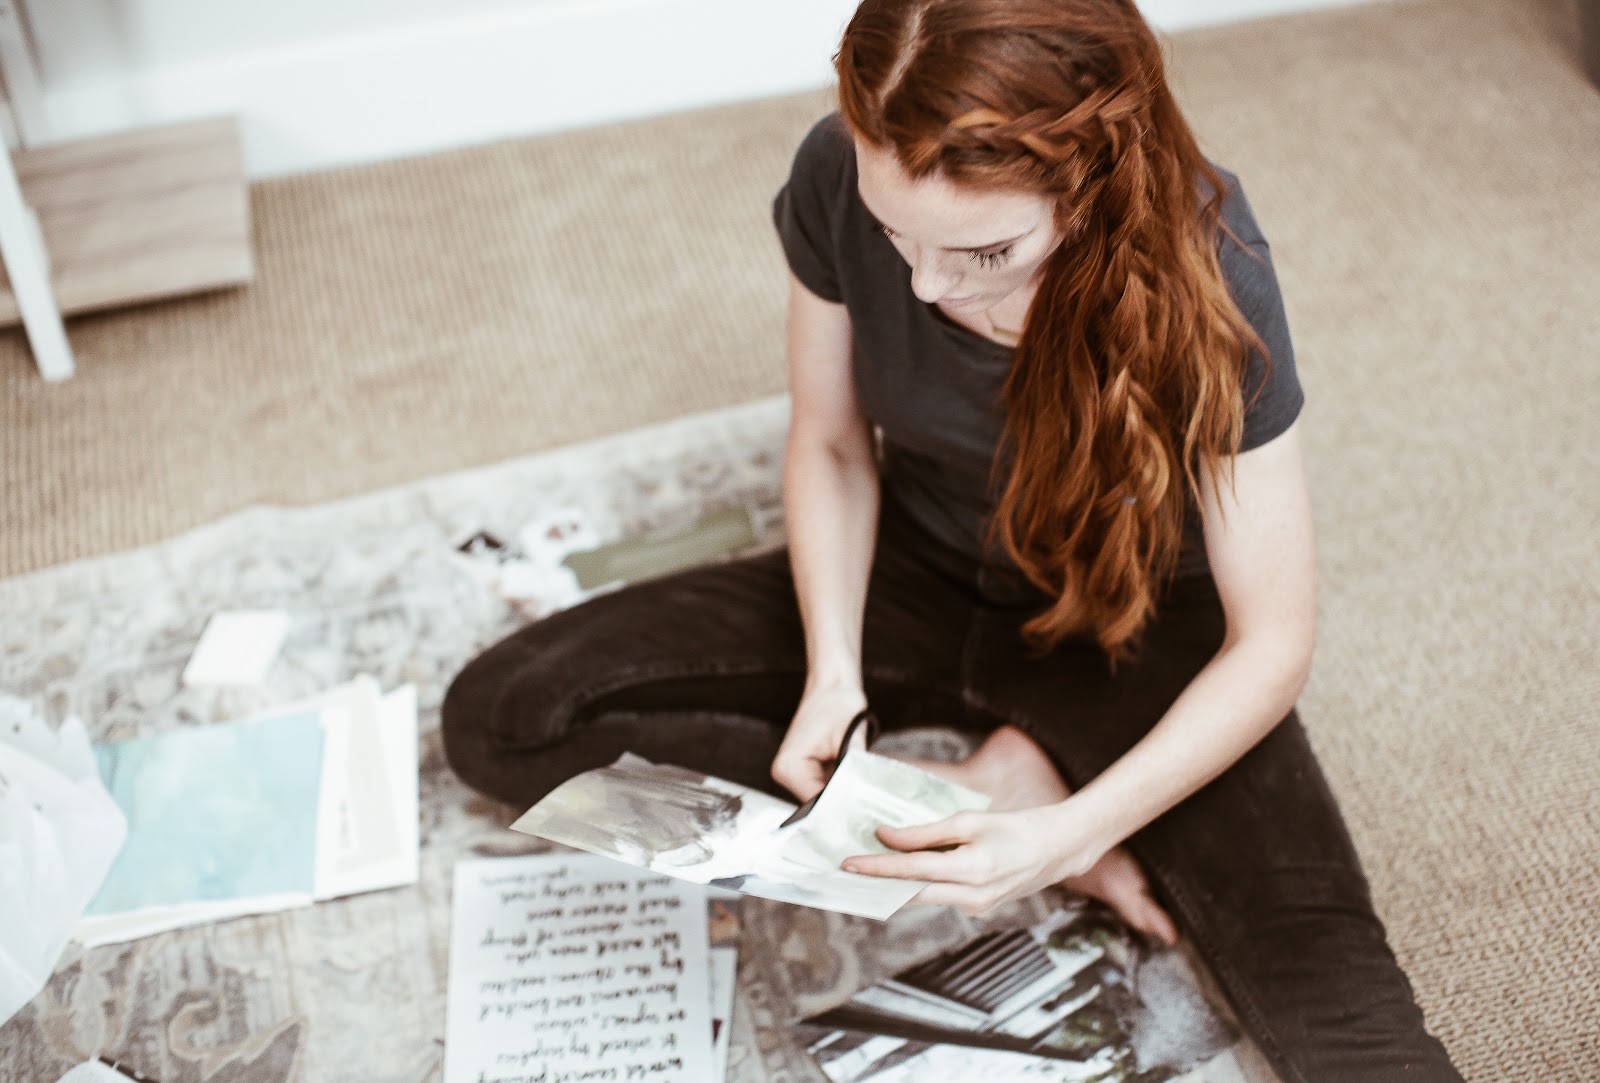
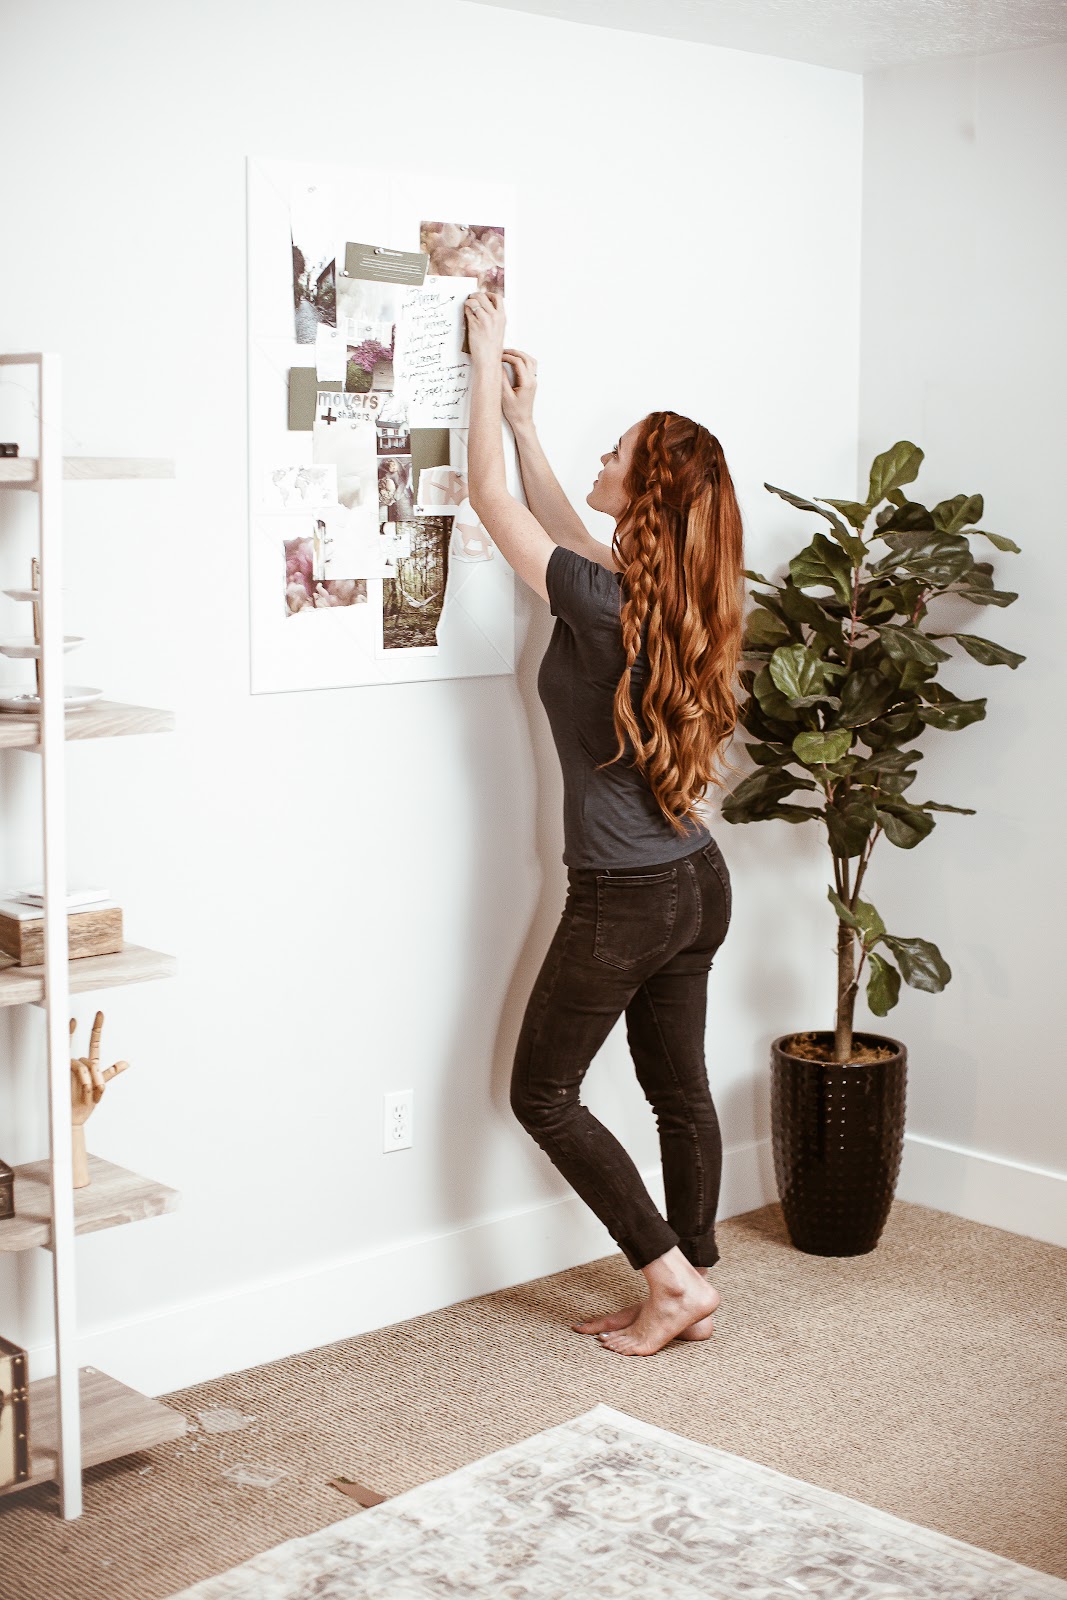
MOOD BOARD
Time spent: This project took about 15 minutes, 5 for the tiles and 10 for collecting inspirational pieces.
Supplies:
- For the mood board, I used 6 of the 'Cross' tiles in the color 'Zinc'
- a pack of push-pins or tacks
- old magazines or photos, etc that you want to put on your inspiration board. Other ideas could be small artwork, printed quotes or photos, pages from a book, sentimental items, flowers or other pieces of nature, washi tape, pieces of fabric, paint swatches, ribbon, etc.
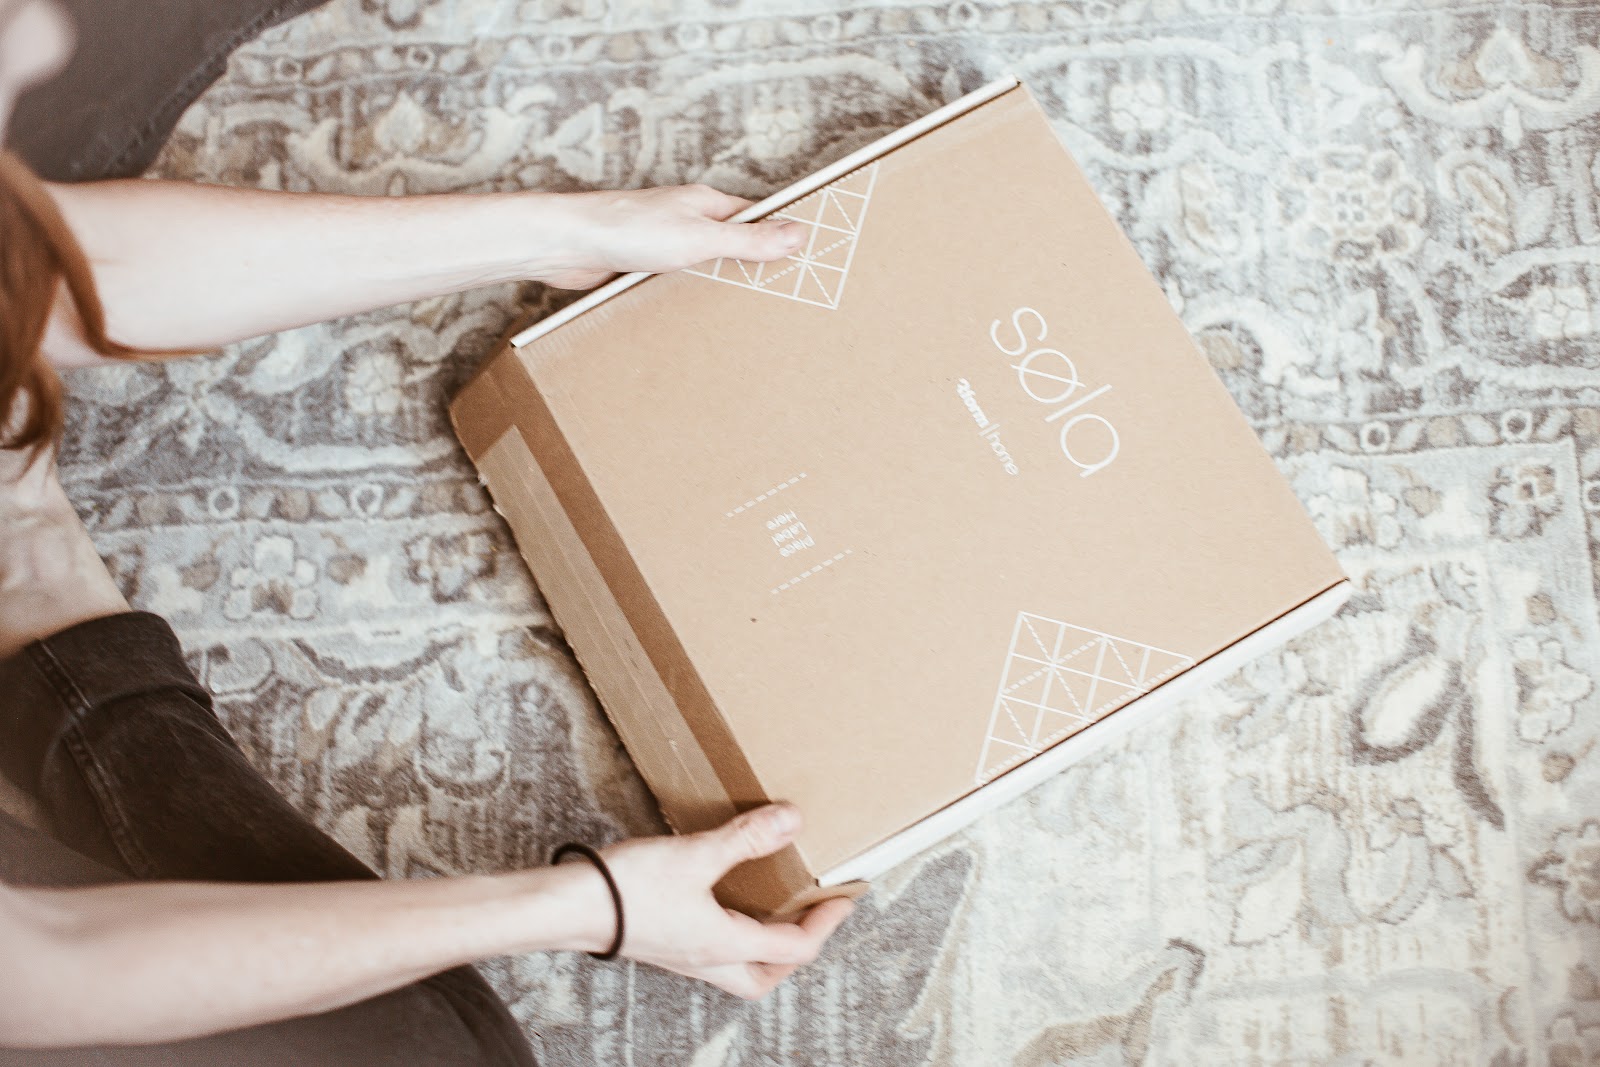
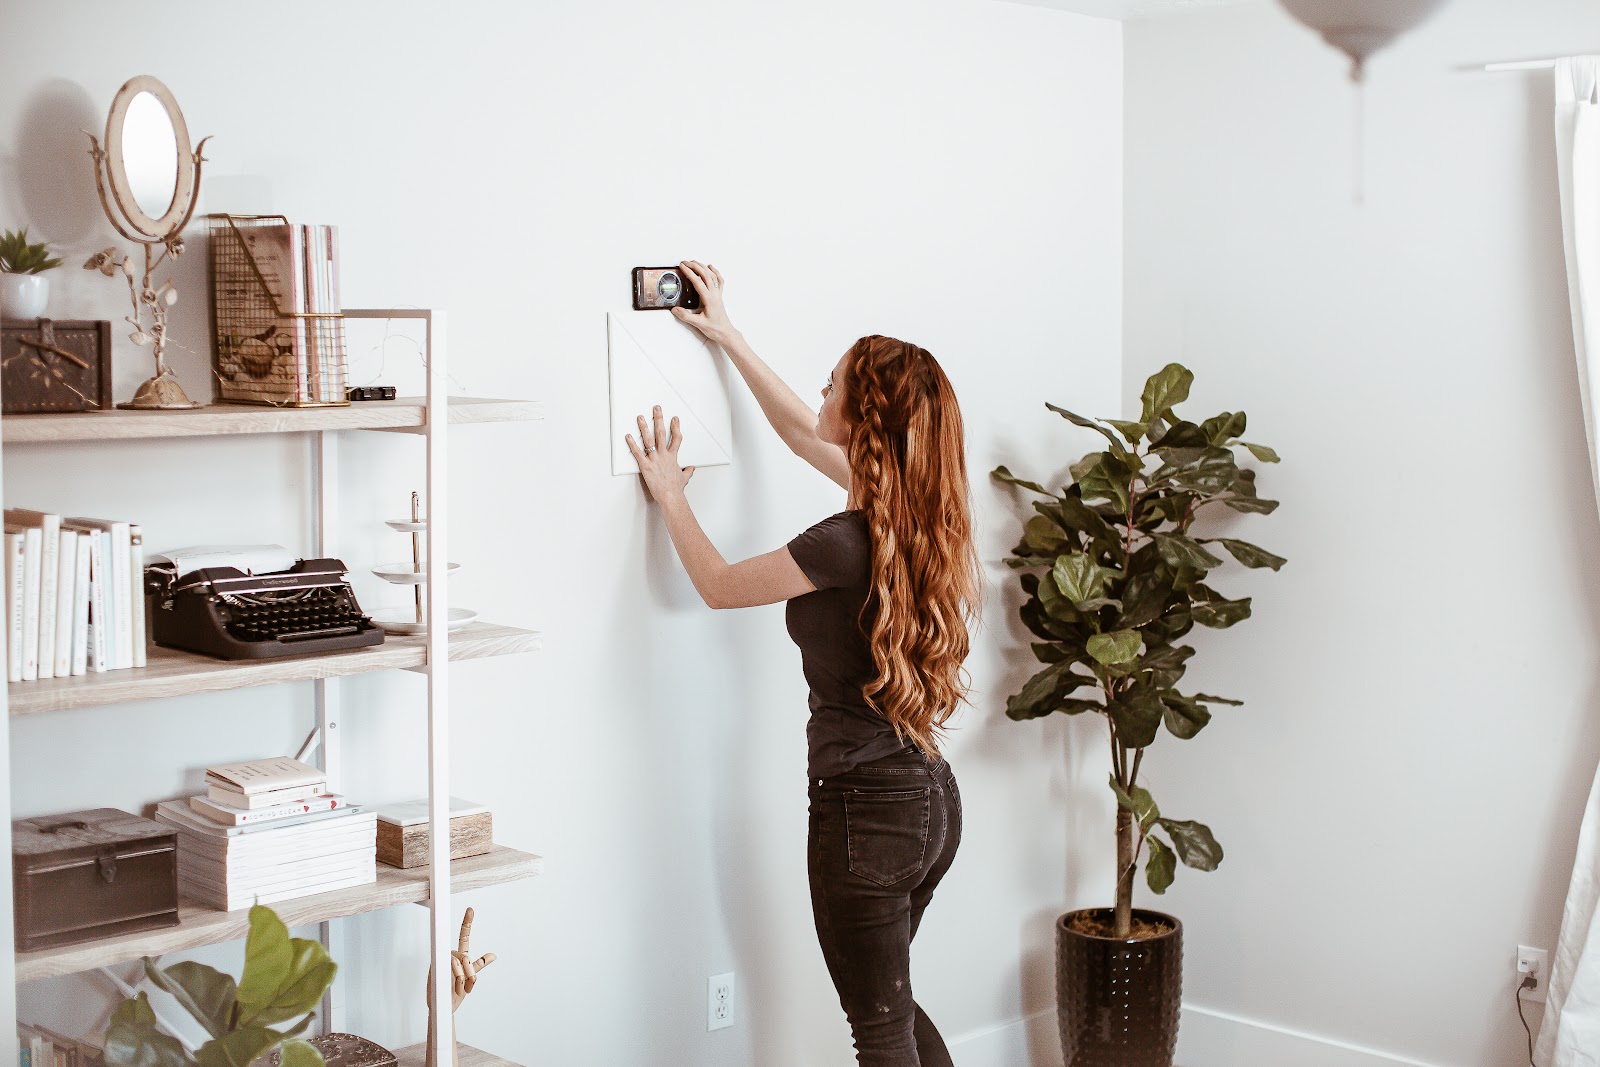
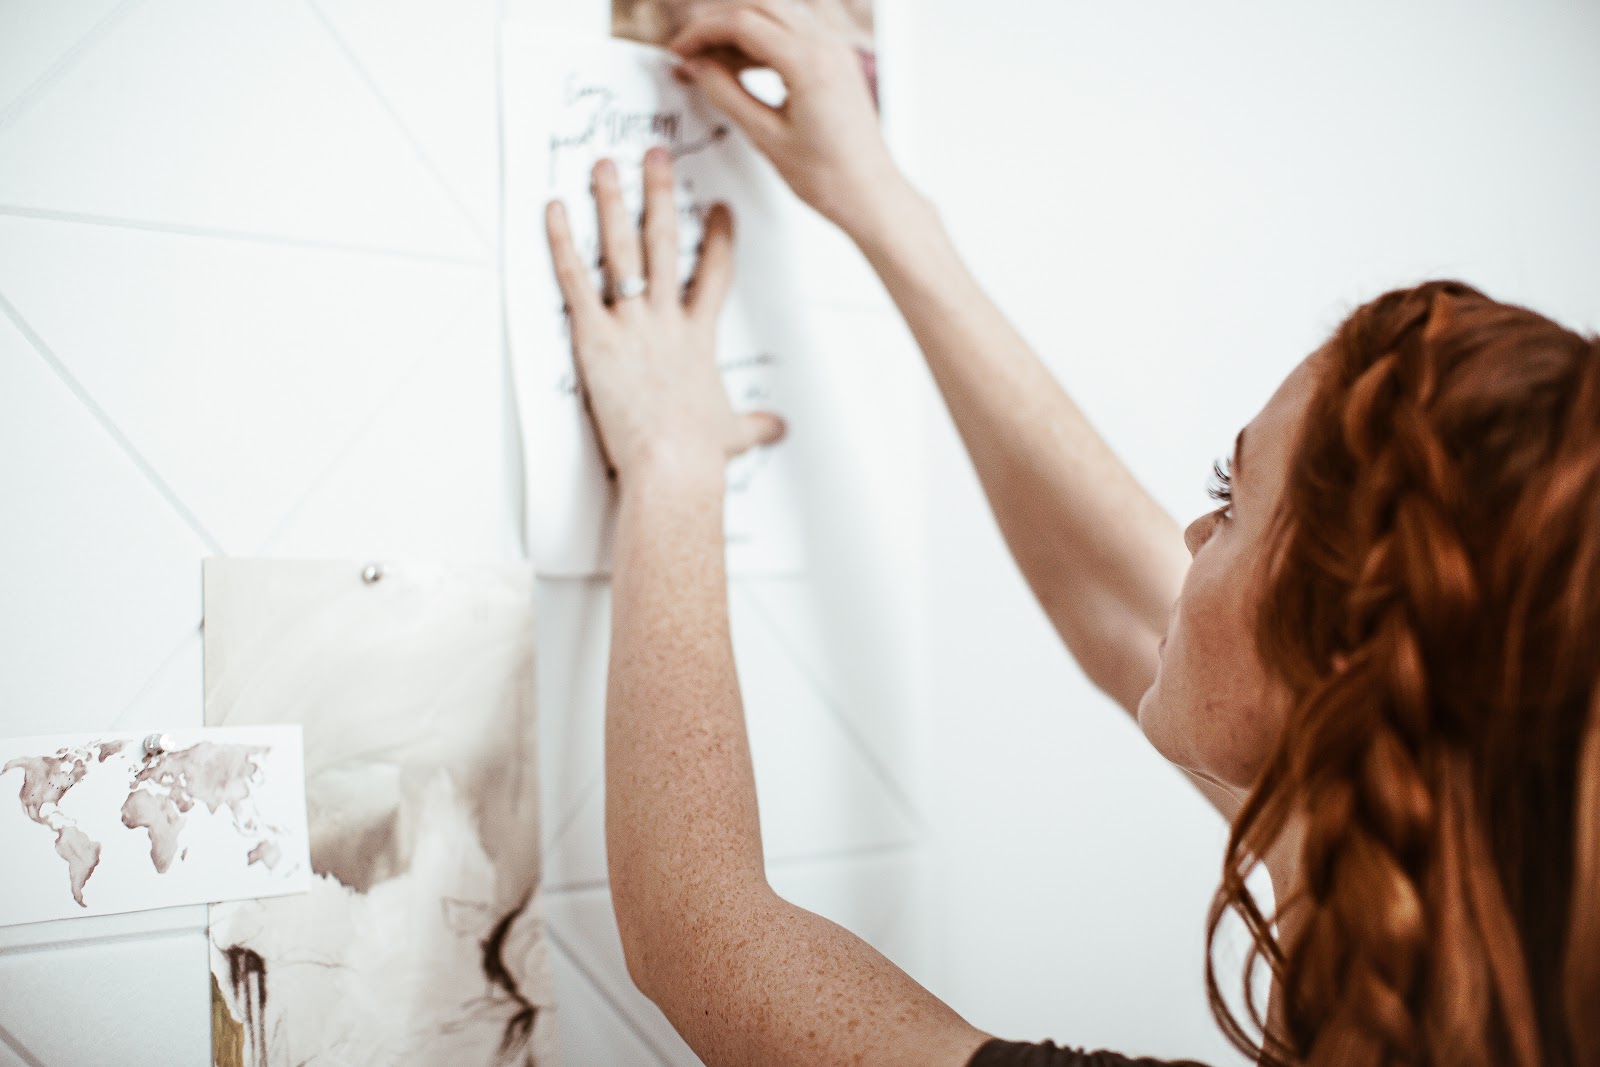
STEP 1: The first step is taking your tiles out of the box and arranging them on the floor in the design you want, then holding a tile or two up on the wall to decide height placement. (Tip: marking lightly with a pencil would be super helpful for a larger design)
STEP 2: Next, peel off the paper tabs covering the adhesive tabs on the corners of your first tile and use a level (I used the app on my phone) to make sure you have it straight before pressing it firmly on each corner to secure it to the wall.
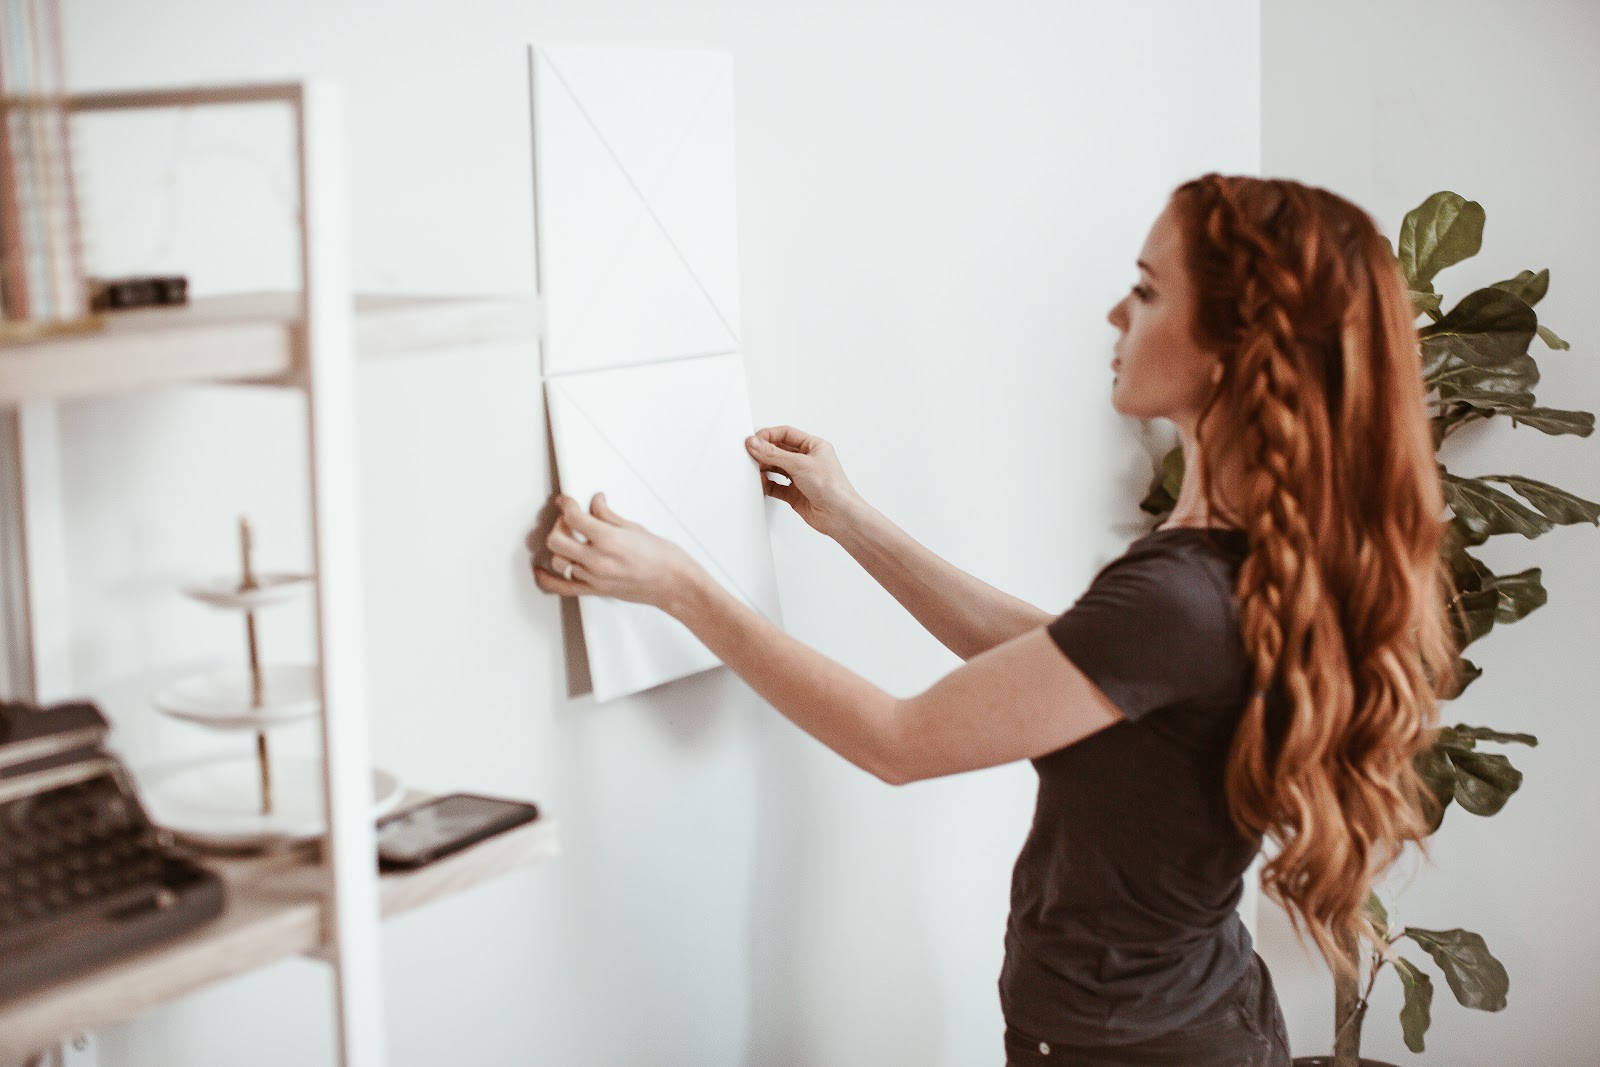
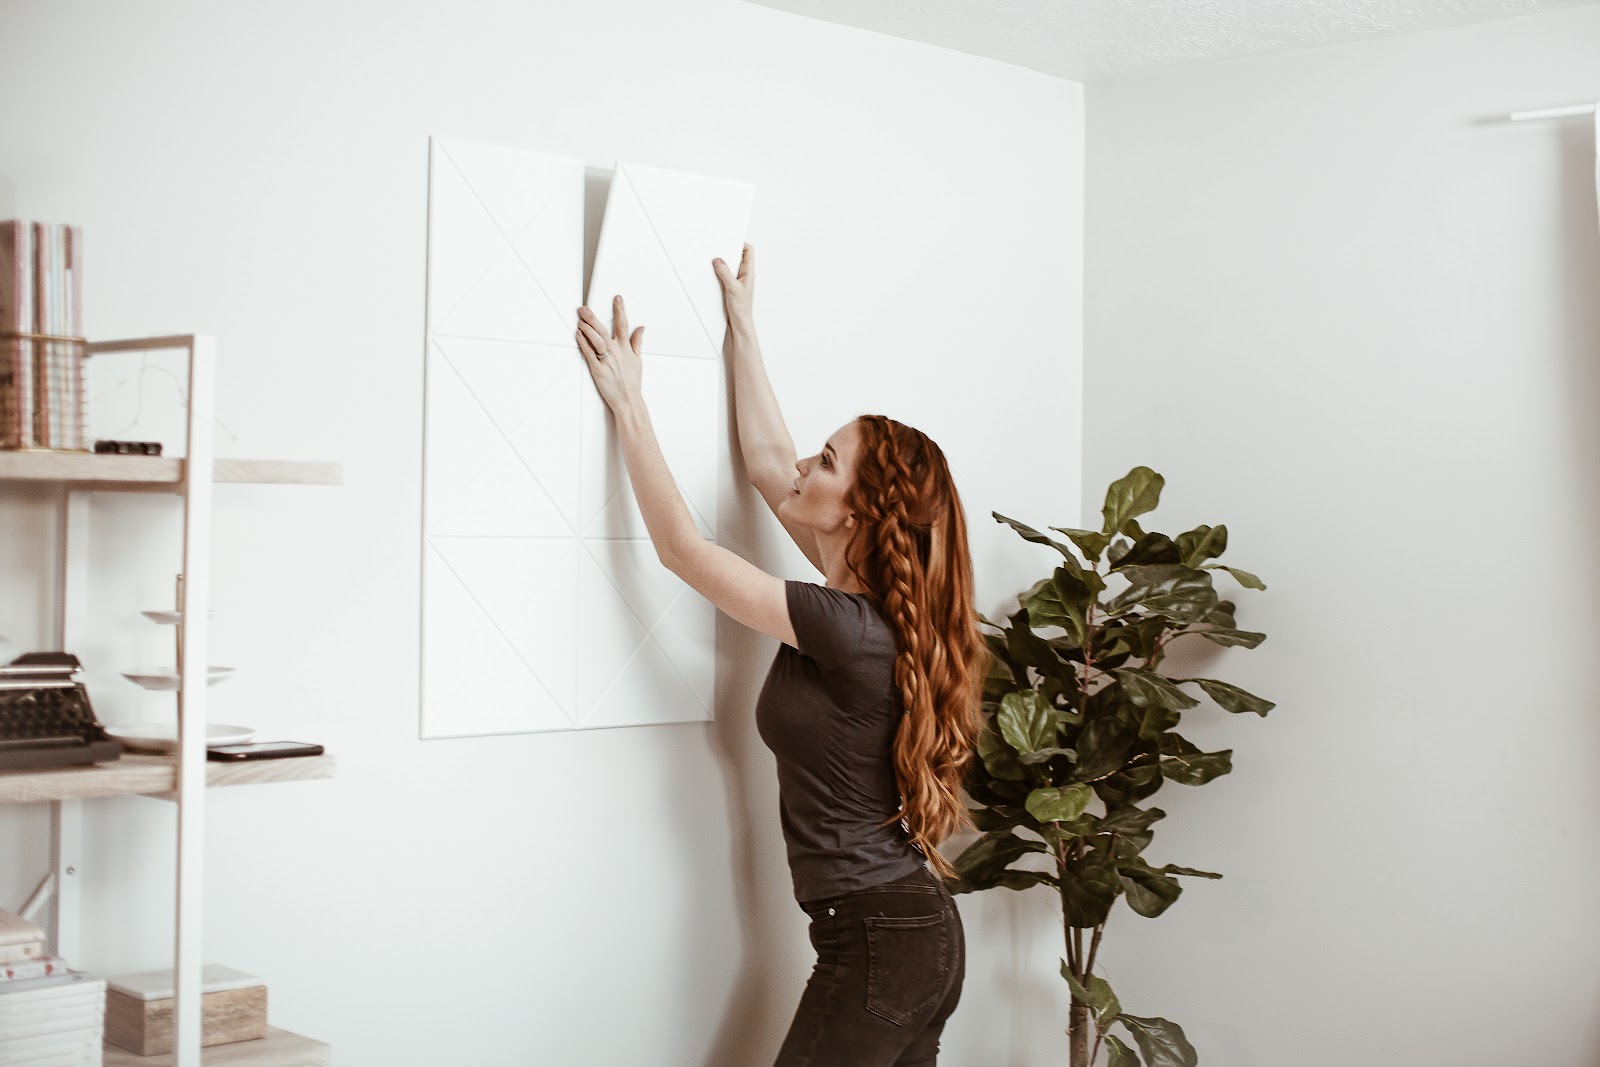
STEP 3: Once you have the first tile in place, it takes only a couple minutes to peel and stick the other tiles around the first, lining them up snuggly together so the seams disappear completely.
STEP 4: Lastly, you can get creative in gathering your materials for your inspiration board, but I simply took some clippings out of a few old magazines for my first go at it. Just make sure that you put up photos and words etc that speak to you and make you feel whatever mood you're going for (i.e. peaceful, motivated, happy, fierce, etc), just have fun with it! xo
--------------------------------------
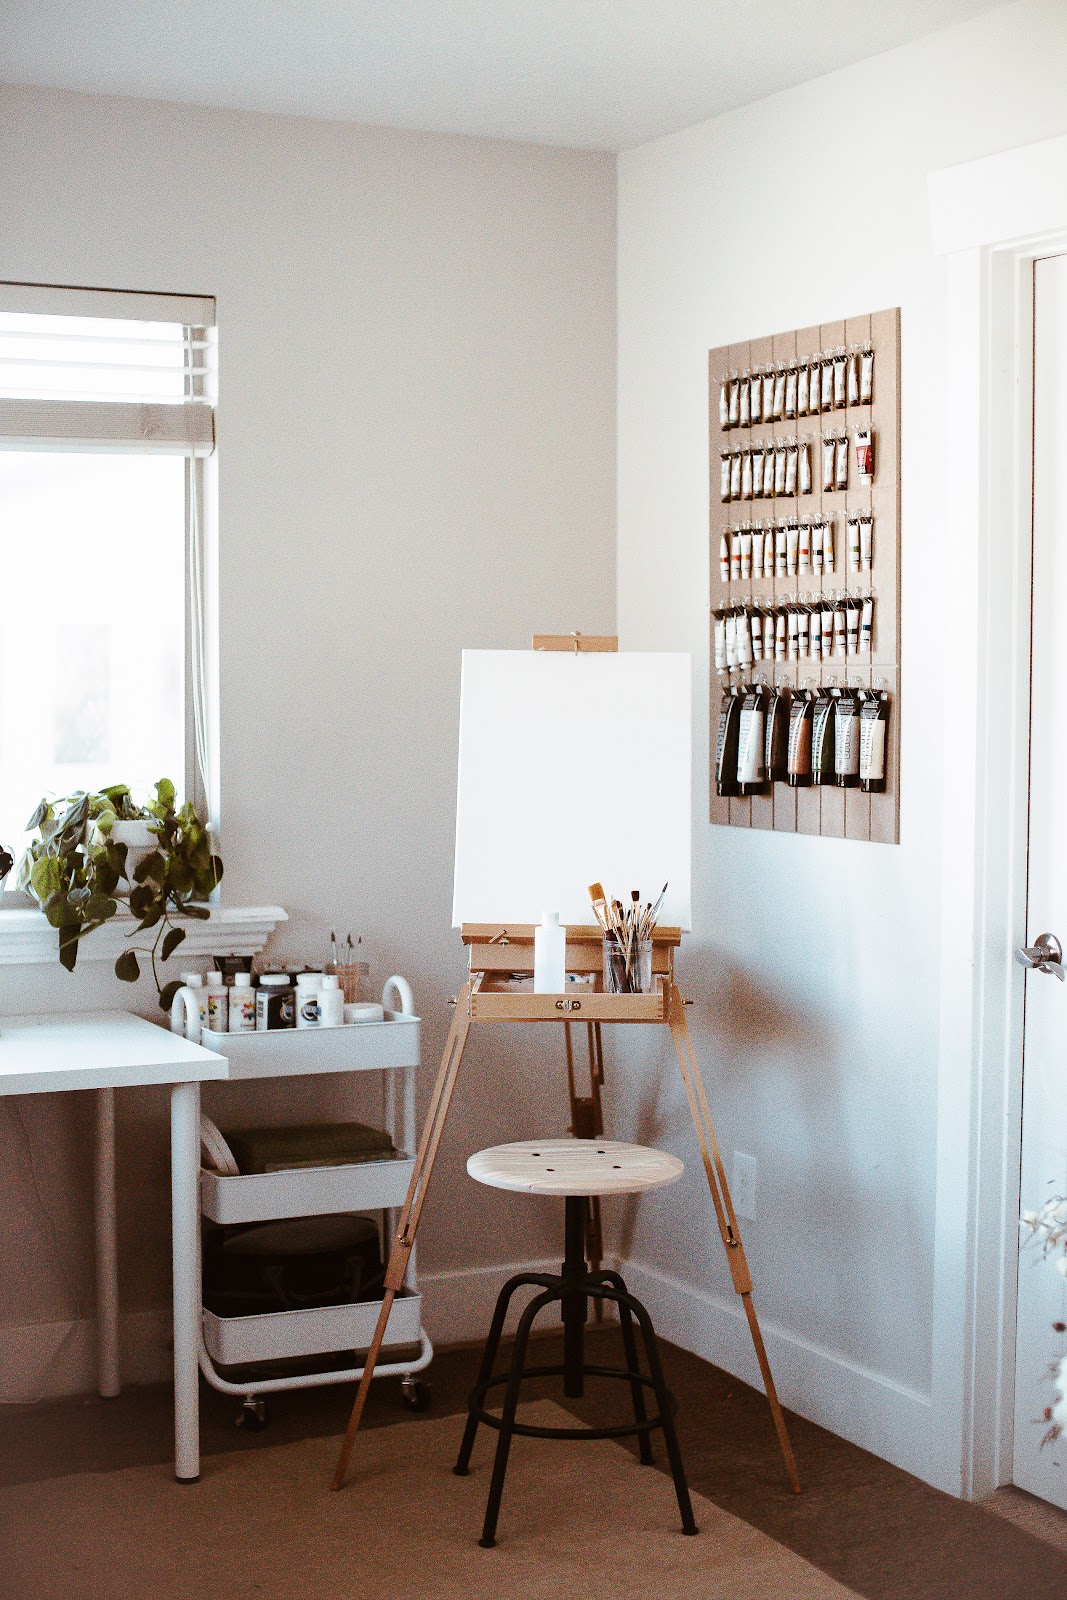
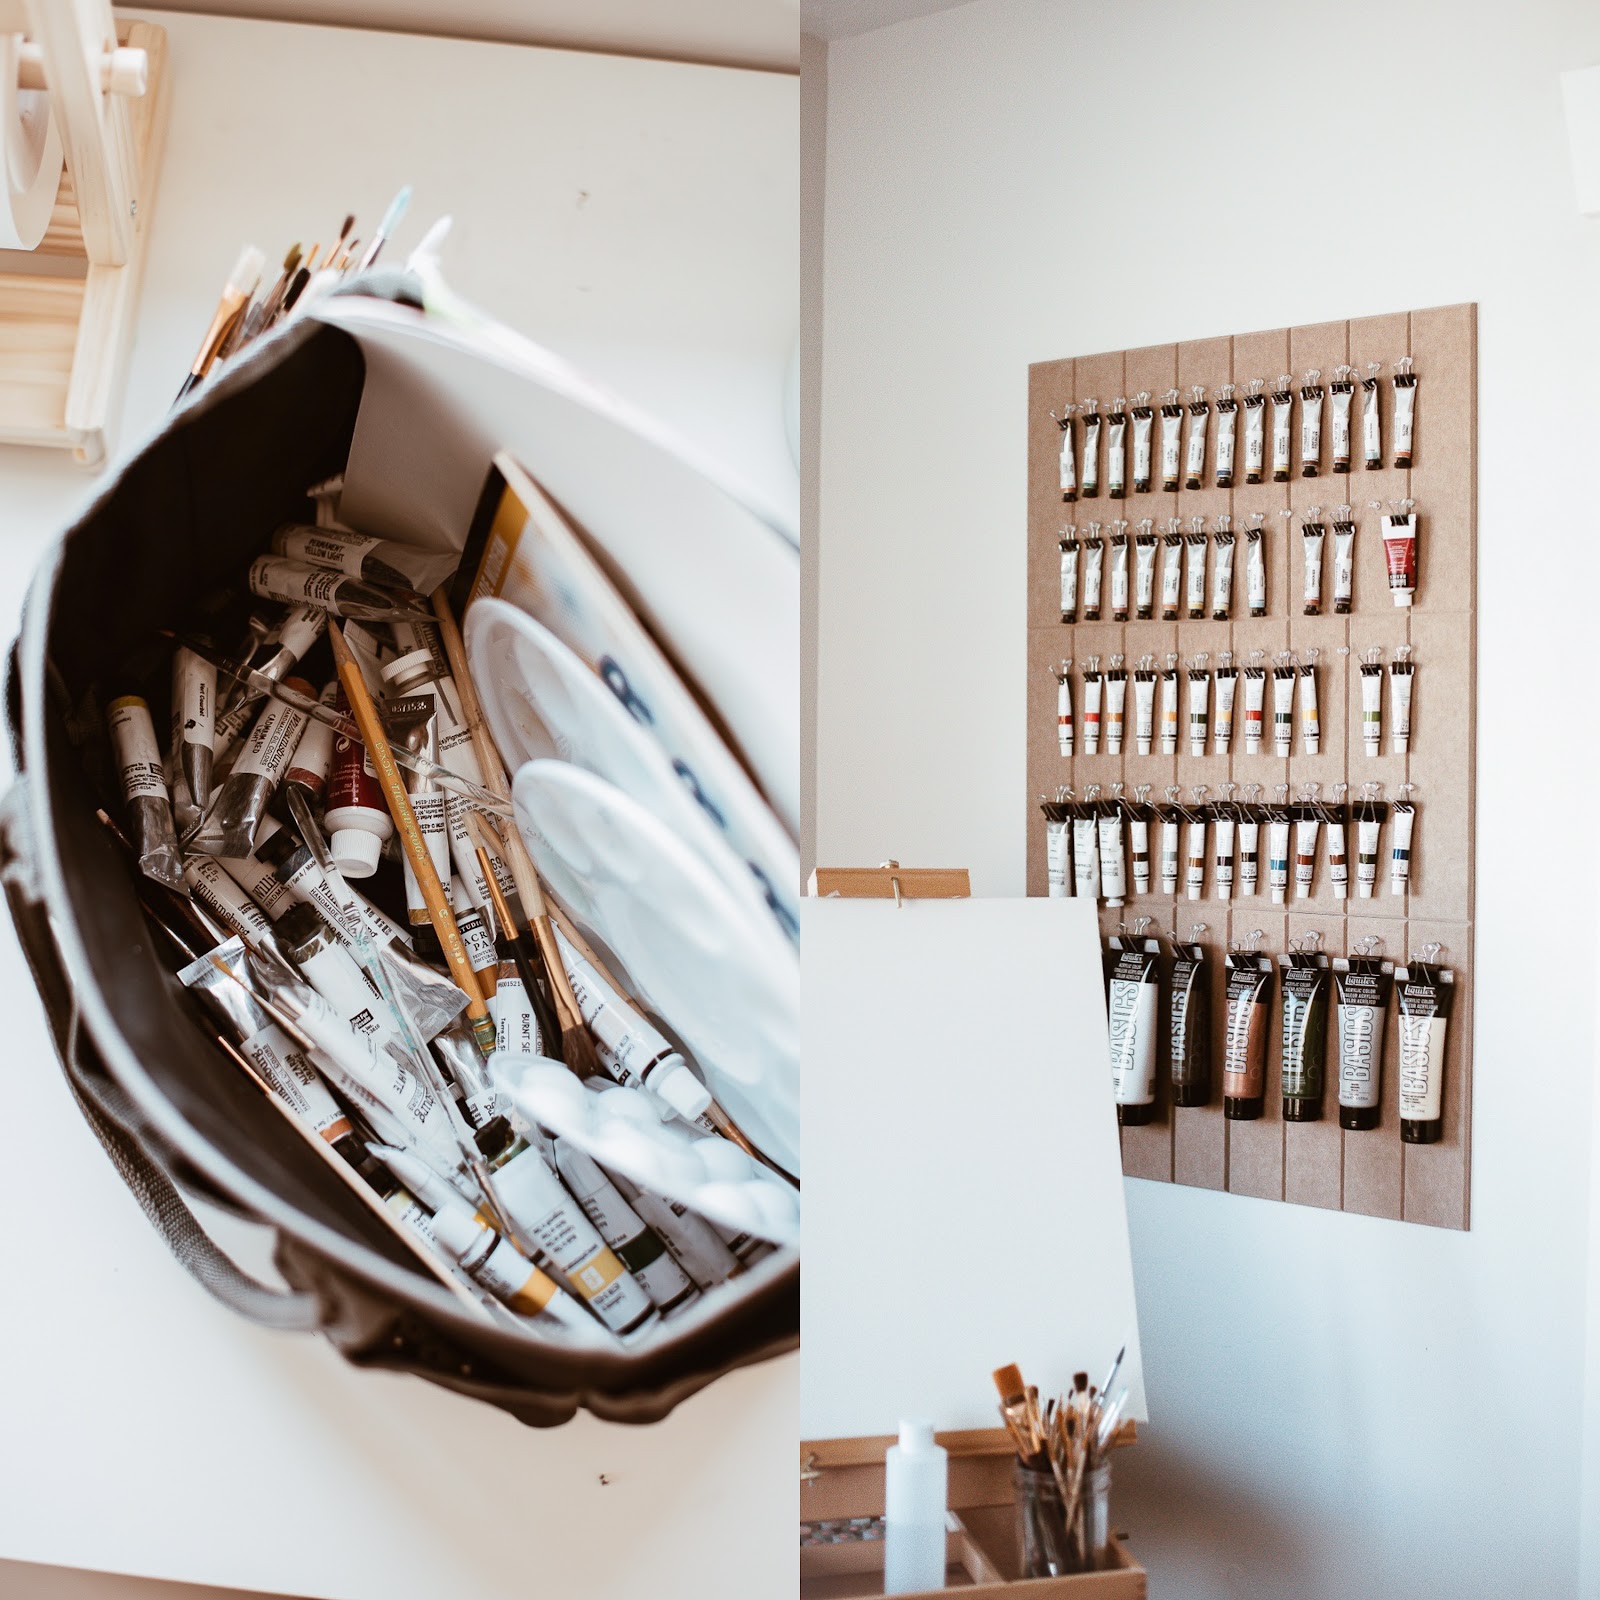
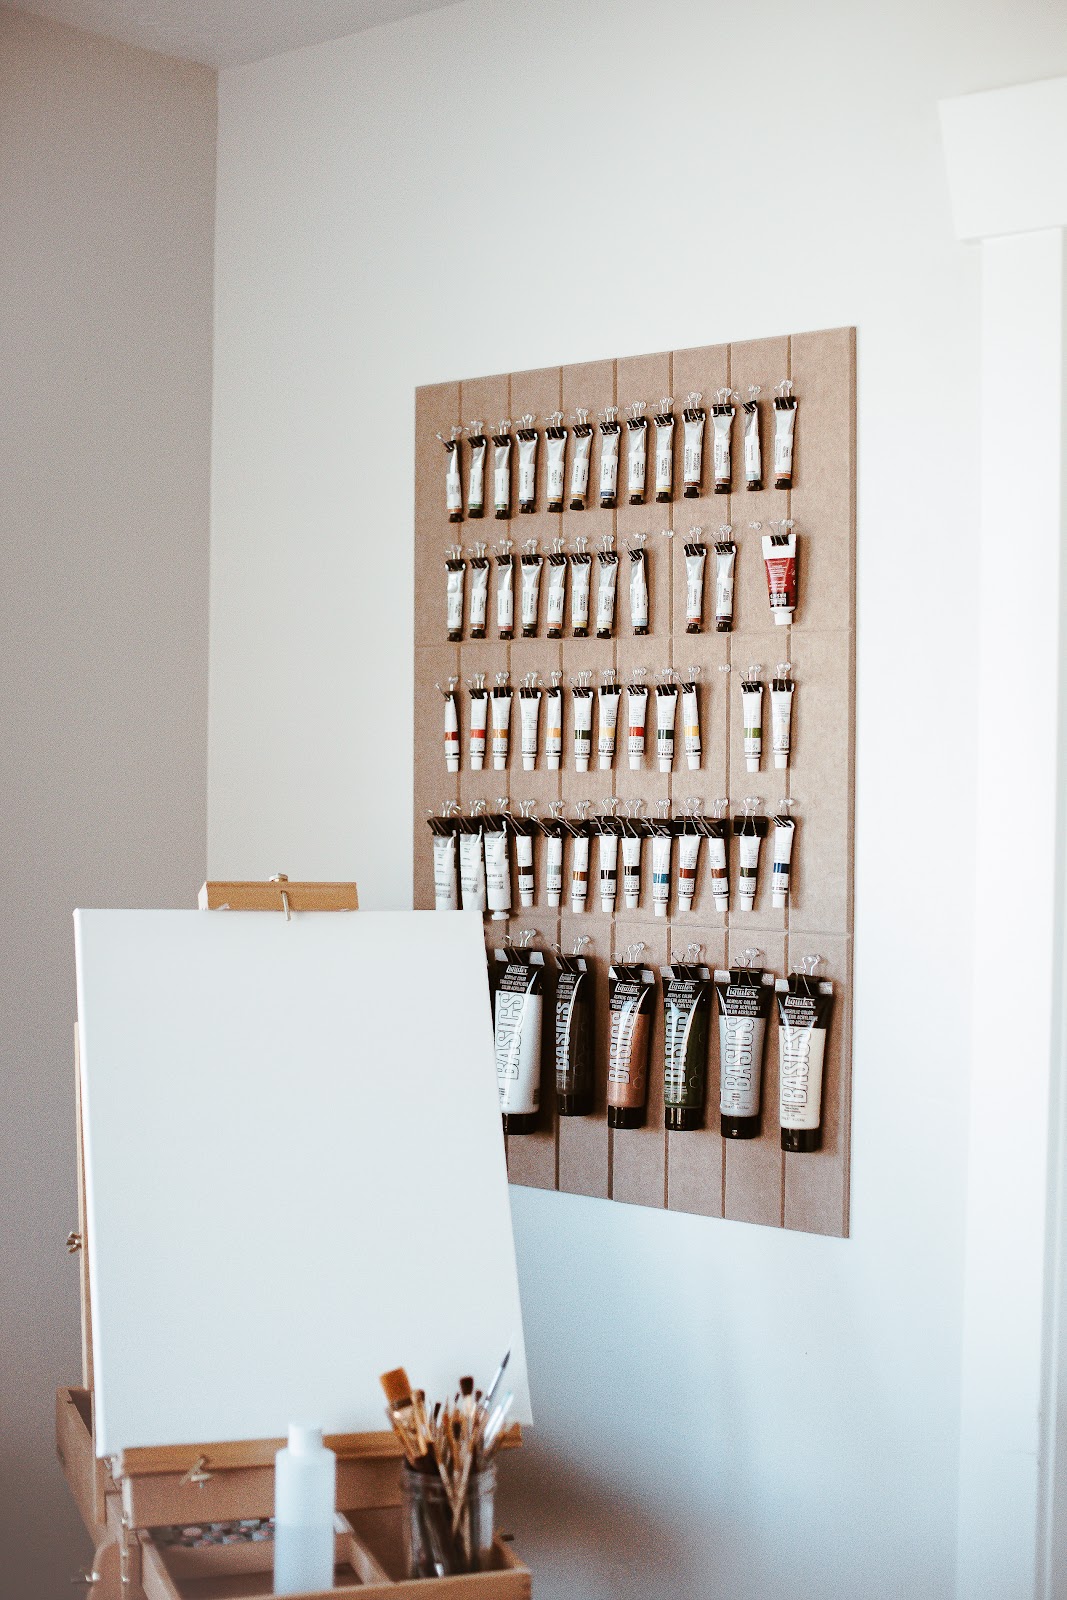
PAINT TUBE ORGANIZER
Time spent: about a half hour including attaching all the binder clips to the tubes.
Supplies:
- For the organizer, I used 6 of the 'Parallel' style tiles in the color 'Cashmere'.
- 1 pack of push pins
- 1 pack of small binder clips
- 1 pack of medium binder clips
Set-up: Repeat the same steps as for unpacking and placing the tiles as with the mood board, then I gathered all my paint tubes together and put the binder clips on all of the tops. Place your rows by starting with the top row, then the bottom row (for symmetry), and then fill in the middle as evenly as possible!Side-note: When I first ordered the tiles I was pretty confident that my big tubes wouldn't hold up, but when they arrived I was happily surprised at how dense and strong they actually were and even my big full tubes hold up awesome!
--------------------------------------
NECKLACE RACK
Time spent: This one took under 10 minutes from start to finish!
Supplies:
- For the rack I used 3 of the '4 Square' tiles in the color 'Nickle'.
- 1 pack of push pins
And that's all for today! I really hope you enjoyed these simple little DIY's and that you're inspired to try out the tiles in your own home, and if you are you can use the code: FIRST30 on the website HERE for 30% off for the first 30 people! and free shipping :)
I've already decided I need to order more to do a command station in our home office, bulletin boards in the kid's rooms, an art display in the craft room, maybe some sound barrier panels in the music room, and the list goes on. You can't beat buying a product that is so versatile and beautiful that's also helping to make such a difference in pollution.
I've already decided I need to order more to do a command station in our home office, bulletin boards in the kid's rooms, an art display in the craft room, maybe some sound barrier panels in the music room, and the list goes on. You can't beat buying a product that is so versatile and beautiful that's also helping to make such a difference in pollution.
As always let me know if you have any questions, I'm curious to know which project you like the most? Thanks so much for visiting loves,
xoxo


Such cute ideas, thanks for sharing the inspiration!
ReplyDeletexx Kelly
Sparkles and Shoes